
Taquito is a TypeScript library that is now present in the vast majority of the web-based dapps of the Tezos ecosystem. If you have used a dapp on Tezos in your browser, you have most certainly used Taquito!
However, it is also possible to use it in any JavaScript-based environment and today, we are going to see how it can be used in a desktop app 🤯
For a personal project, I was trying to make a Svelte app that I wanted to build with Electron. However, I ran into multiple problems in my endeavor, and I had to stop as I couldn’t make it work. Then I heard about Tauri. The smaller app size it creates was very interesting, and since I started learning Rust a couple of months ago, being able to use that language in concert with TypeScript was extremely enticing!
I had a few hours of free time on a bank holiday morning and decided to create a desktop app using Tauri and Taquito to make a simple Tezos wallet. If you want to have a look at the code now, you can check the repo. In the next paragraphs, I will show you how to set up Vite (another awesome tool!) to use it with Taquito and how to set up Tauri to wrap your Svelte app and create the desktop app.
⚠️⚠️ WARNING: The app we are going to build is a very simple Tezos wallet. Although the app doesn’t store your private key, there are no safety measures implemented to guarantee it won’t be exposed. You should NOT enter a private key that has funds on mainnet. This wallet is only created to demonstrate how Taquito works with Tauri, not to be an app of its own.
ℹ️ Note: This tutorial assumes you know TypeScript and Svelte, you have a general knowledge of the JavaScript ecosystem, and you know how to use NPM. The app is a simple Tezos wallet and multiple features have been left out as they are not of interest for this tutorial, i.e., security features when handling the user’s private key.
Setting up the Vite app
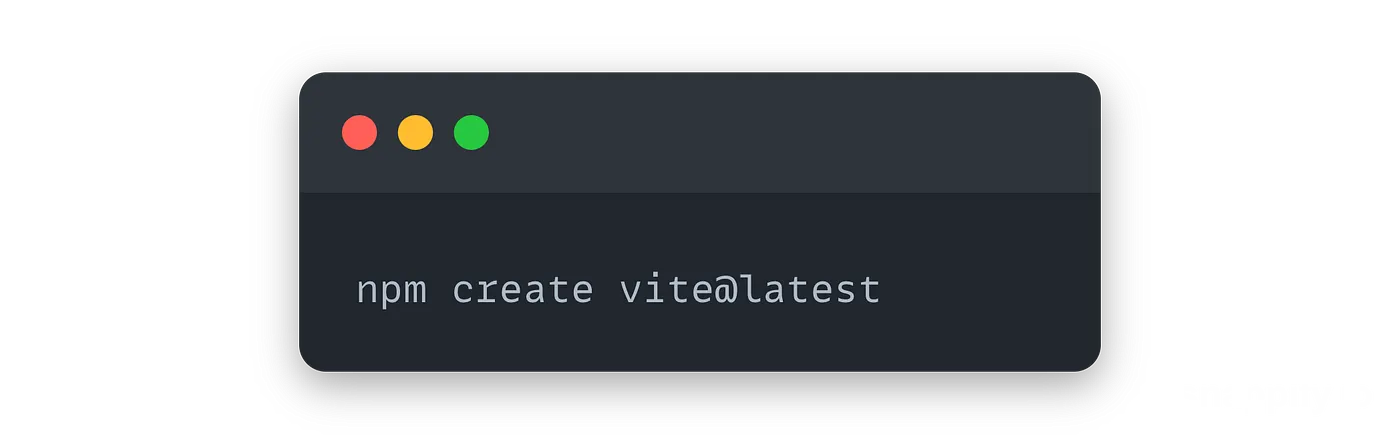
The first step in creating the app is to create a Vite app with Svelte. Open a new terminal and type:
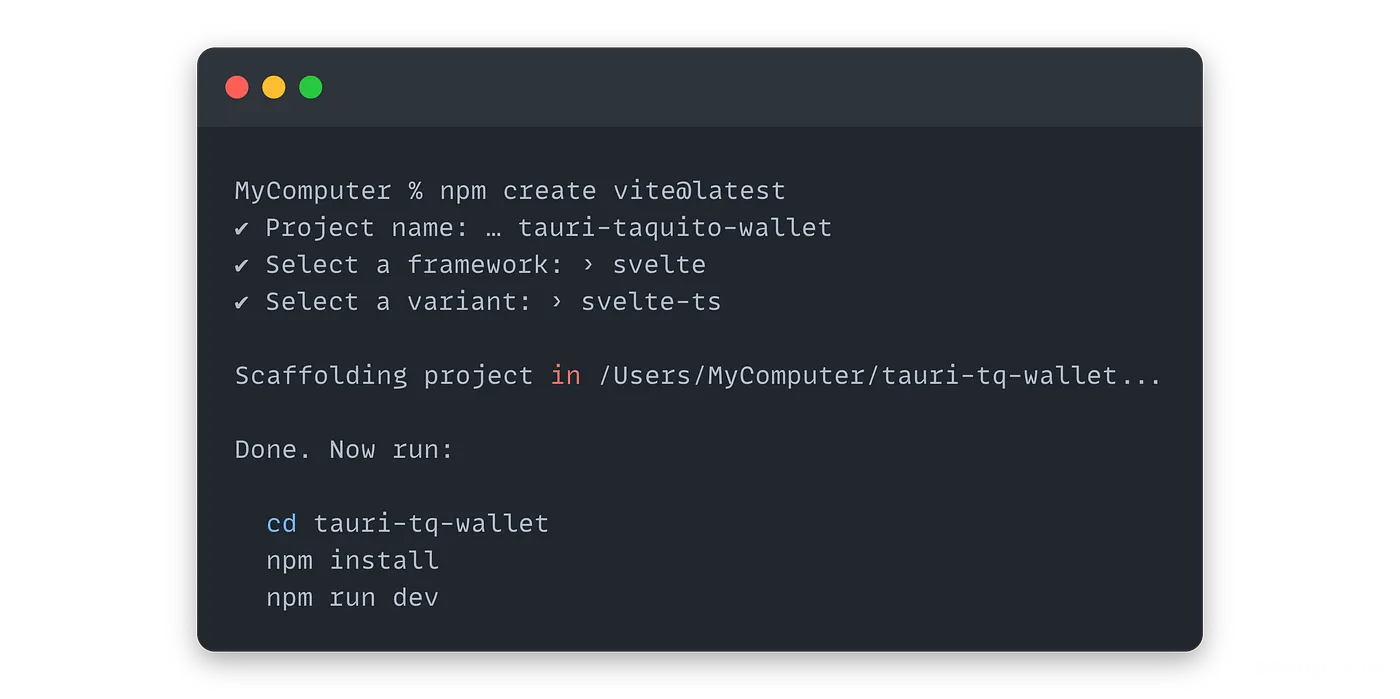
Then follow the instructions in the terminal and choose svelte-ts for the framework:
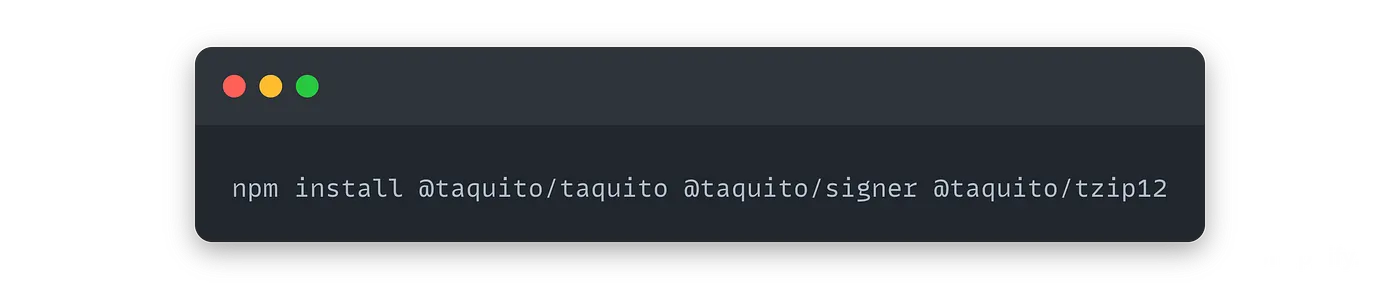
Now let’s install Taquito. We will need the @taquito/taquito library to interact with the blockchain, @taquito/signer to sign transactions and @taquito/tzip12 to parse NFT metadata:
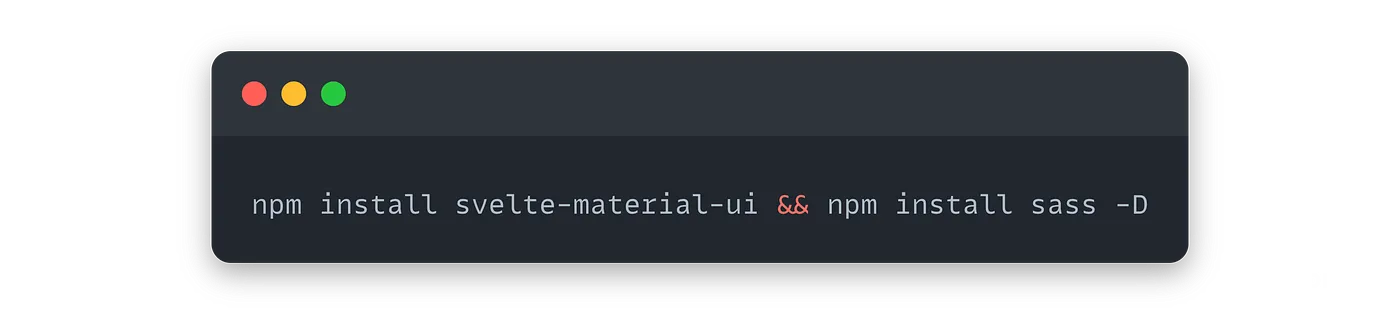
We will also use Svelte Material UI and Sass in our Svelte app:
Now, Taquito is not going to work with Vite out-of-the-box and we have to slightly tweak the setup to make it work, but nothing too complicated.
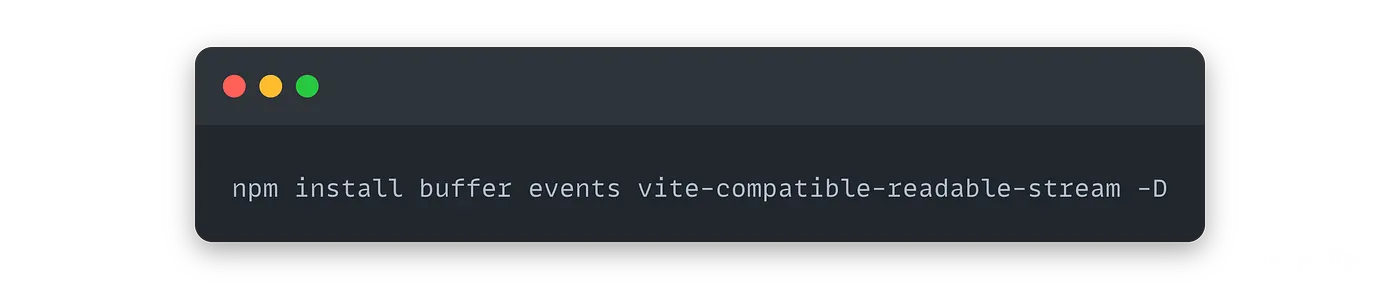
First, we need to install the events, the vite-compatible-readable-stream and the buffer libraries as dev dependencies:
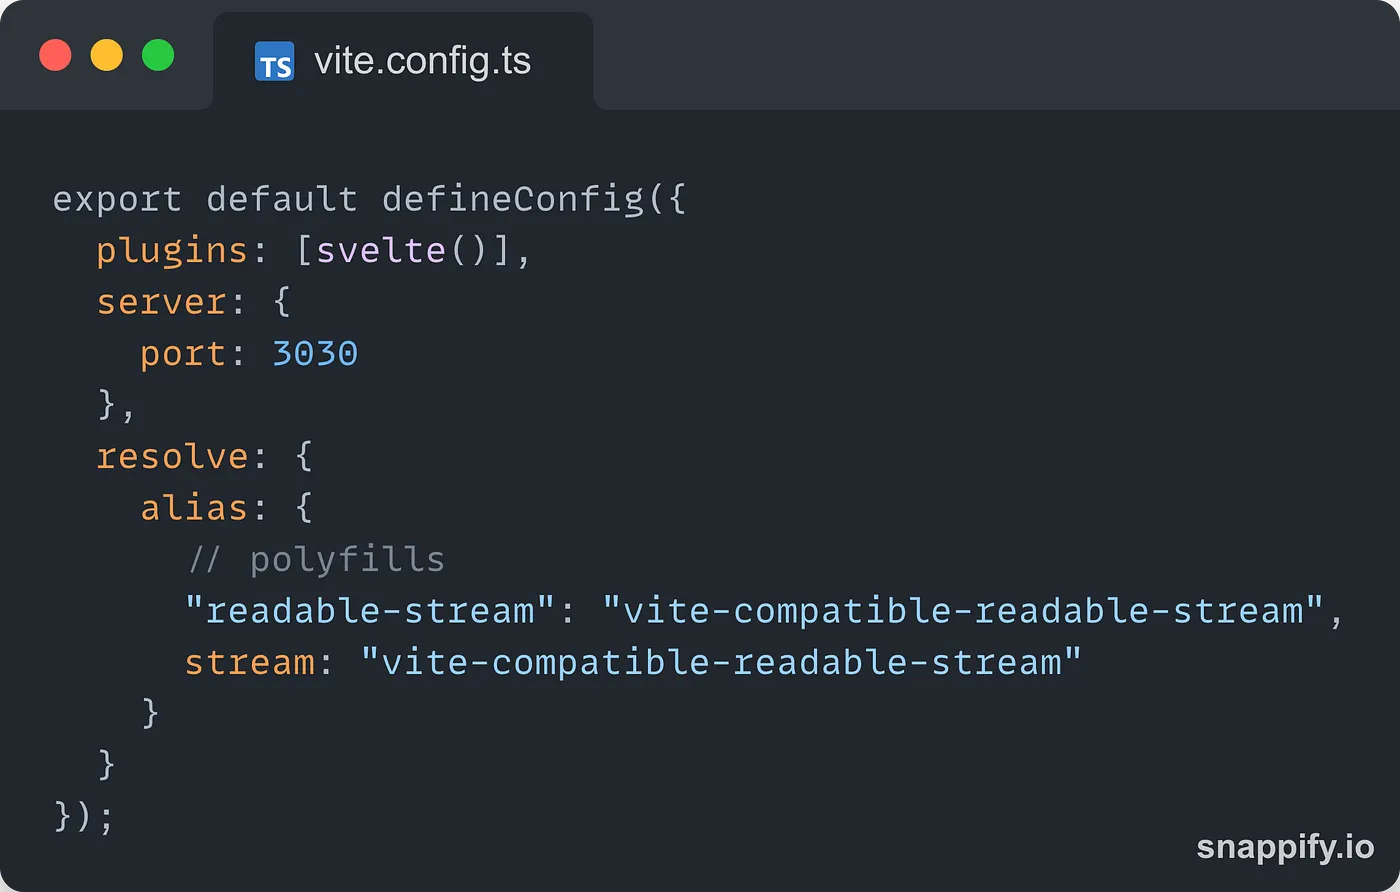
In the vite.config.ts file, add this configuration:
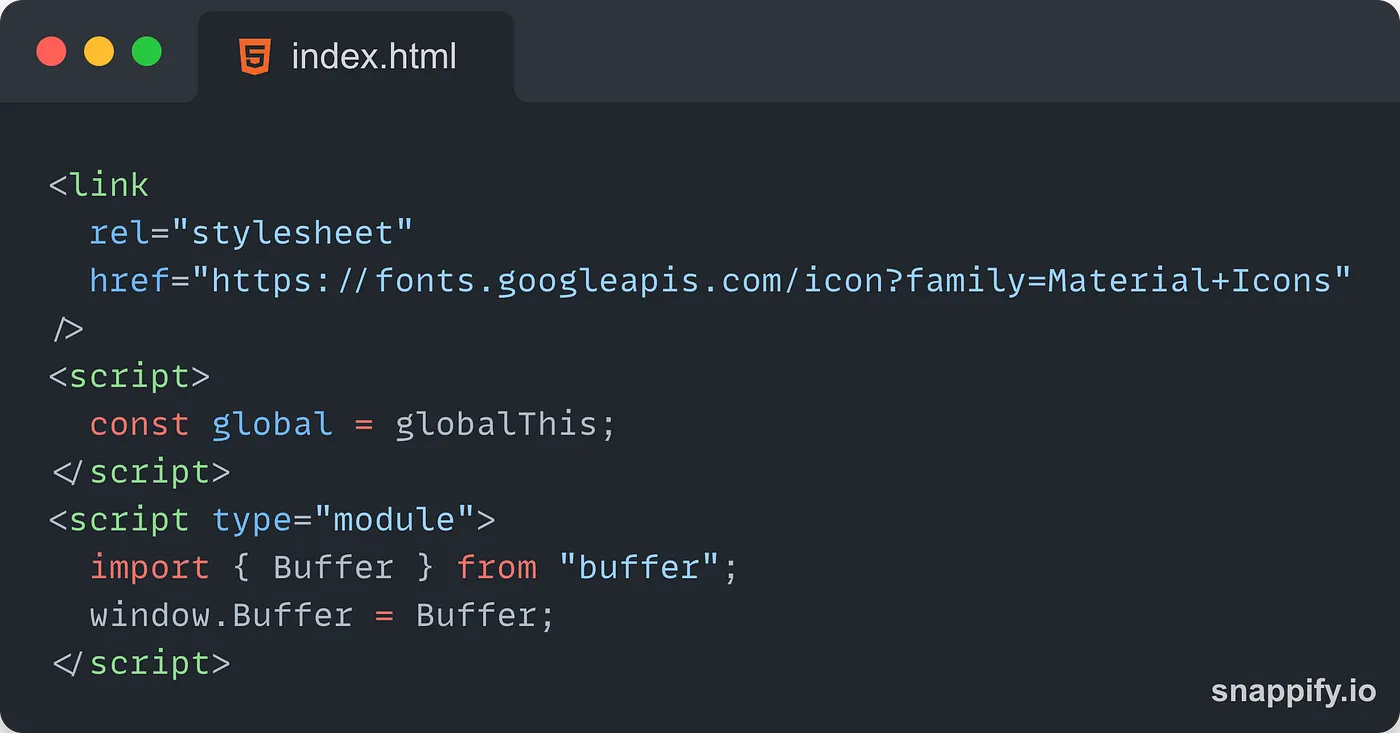
To finish, add these tags to the index.html file, the link tag to import the Material UI Icons we will need and the script tags to be able to use Taquito:
Note: this configuration has been tested with the following versions of the libraries:
- vite: 2.9.9
- svelte: 3.44.0
- sass: 1.53.0
Now that Svelte and Vite are ready, let’s set up Tauri!
Setting up Tauri
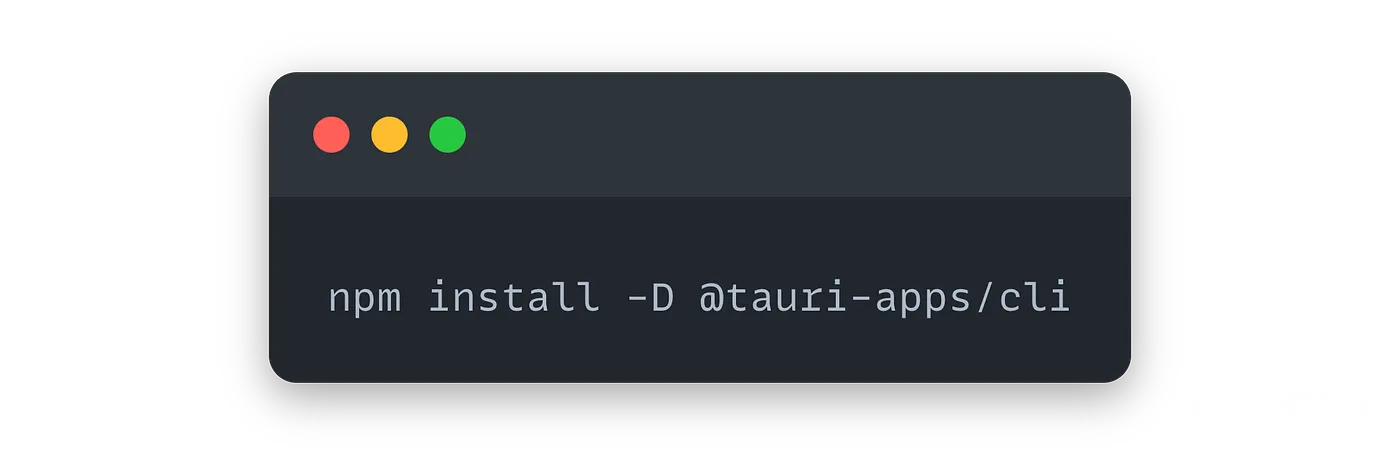
The first thing to do is to install the Tauri CLI:
Once the installation process is done, add tauri to your package.json file:
{
  "scripts": {
    "tauri": "tauri"
  }
}
Now, we can install Tauri:
Select the options by default, but change the one for the dev server to 3030. You can then add a script to your package.json file to start the dev server:
"start": "sirv public --no-clear --port 3030"Now, go to the tauri-src folder and find the tauri.conf.json file. Open it and change these two lines to tell Tauri what should be done before launching:
"beforeDevCommand": "npm run dev",
"beforeBuildCommand": "npm run build"
"distDir": "../dist"
Tauri will launch your Svelte/Vite app on localhost:3030 and will connect to the same port when opening a desktop window. We must also change the output directory as Vite is going to save the build in the dist folder instead of the public folder as Tauri expects.
Validate your setup with npm run tauri info:
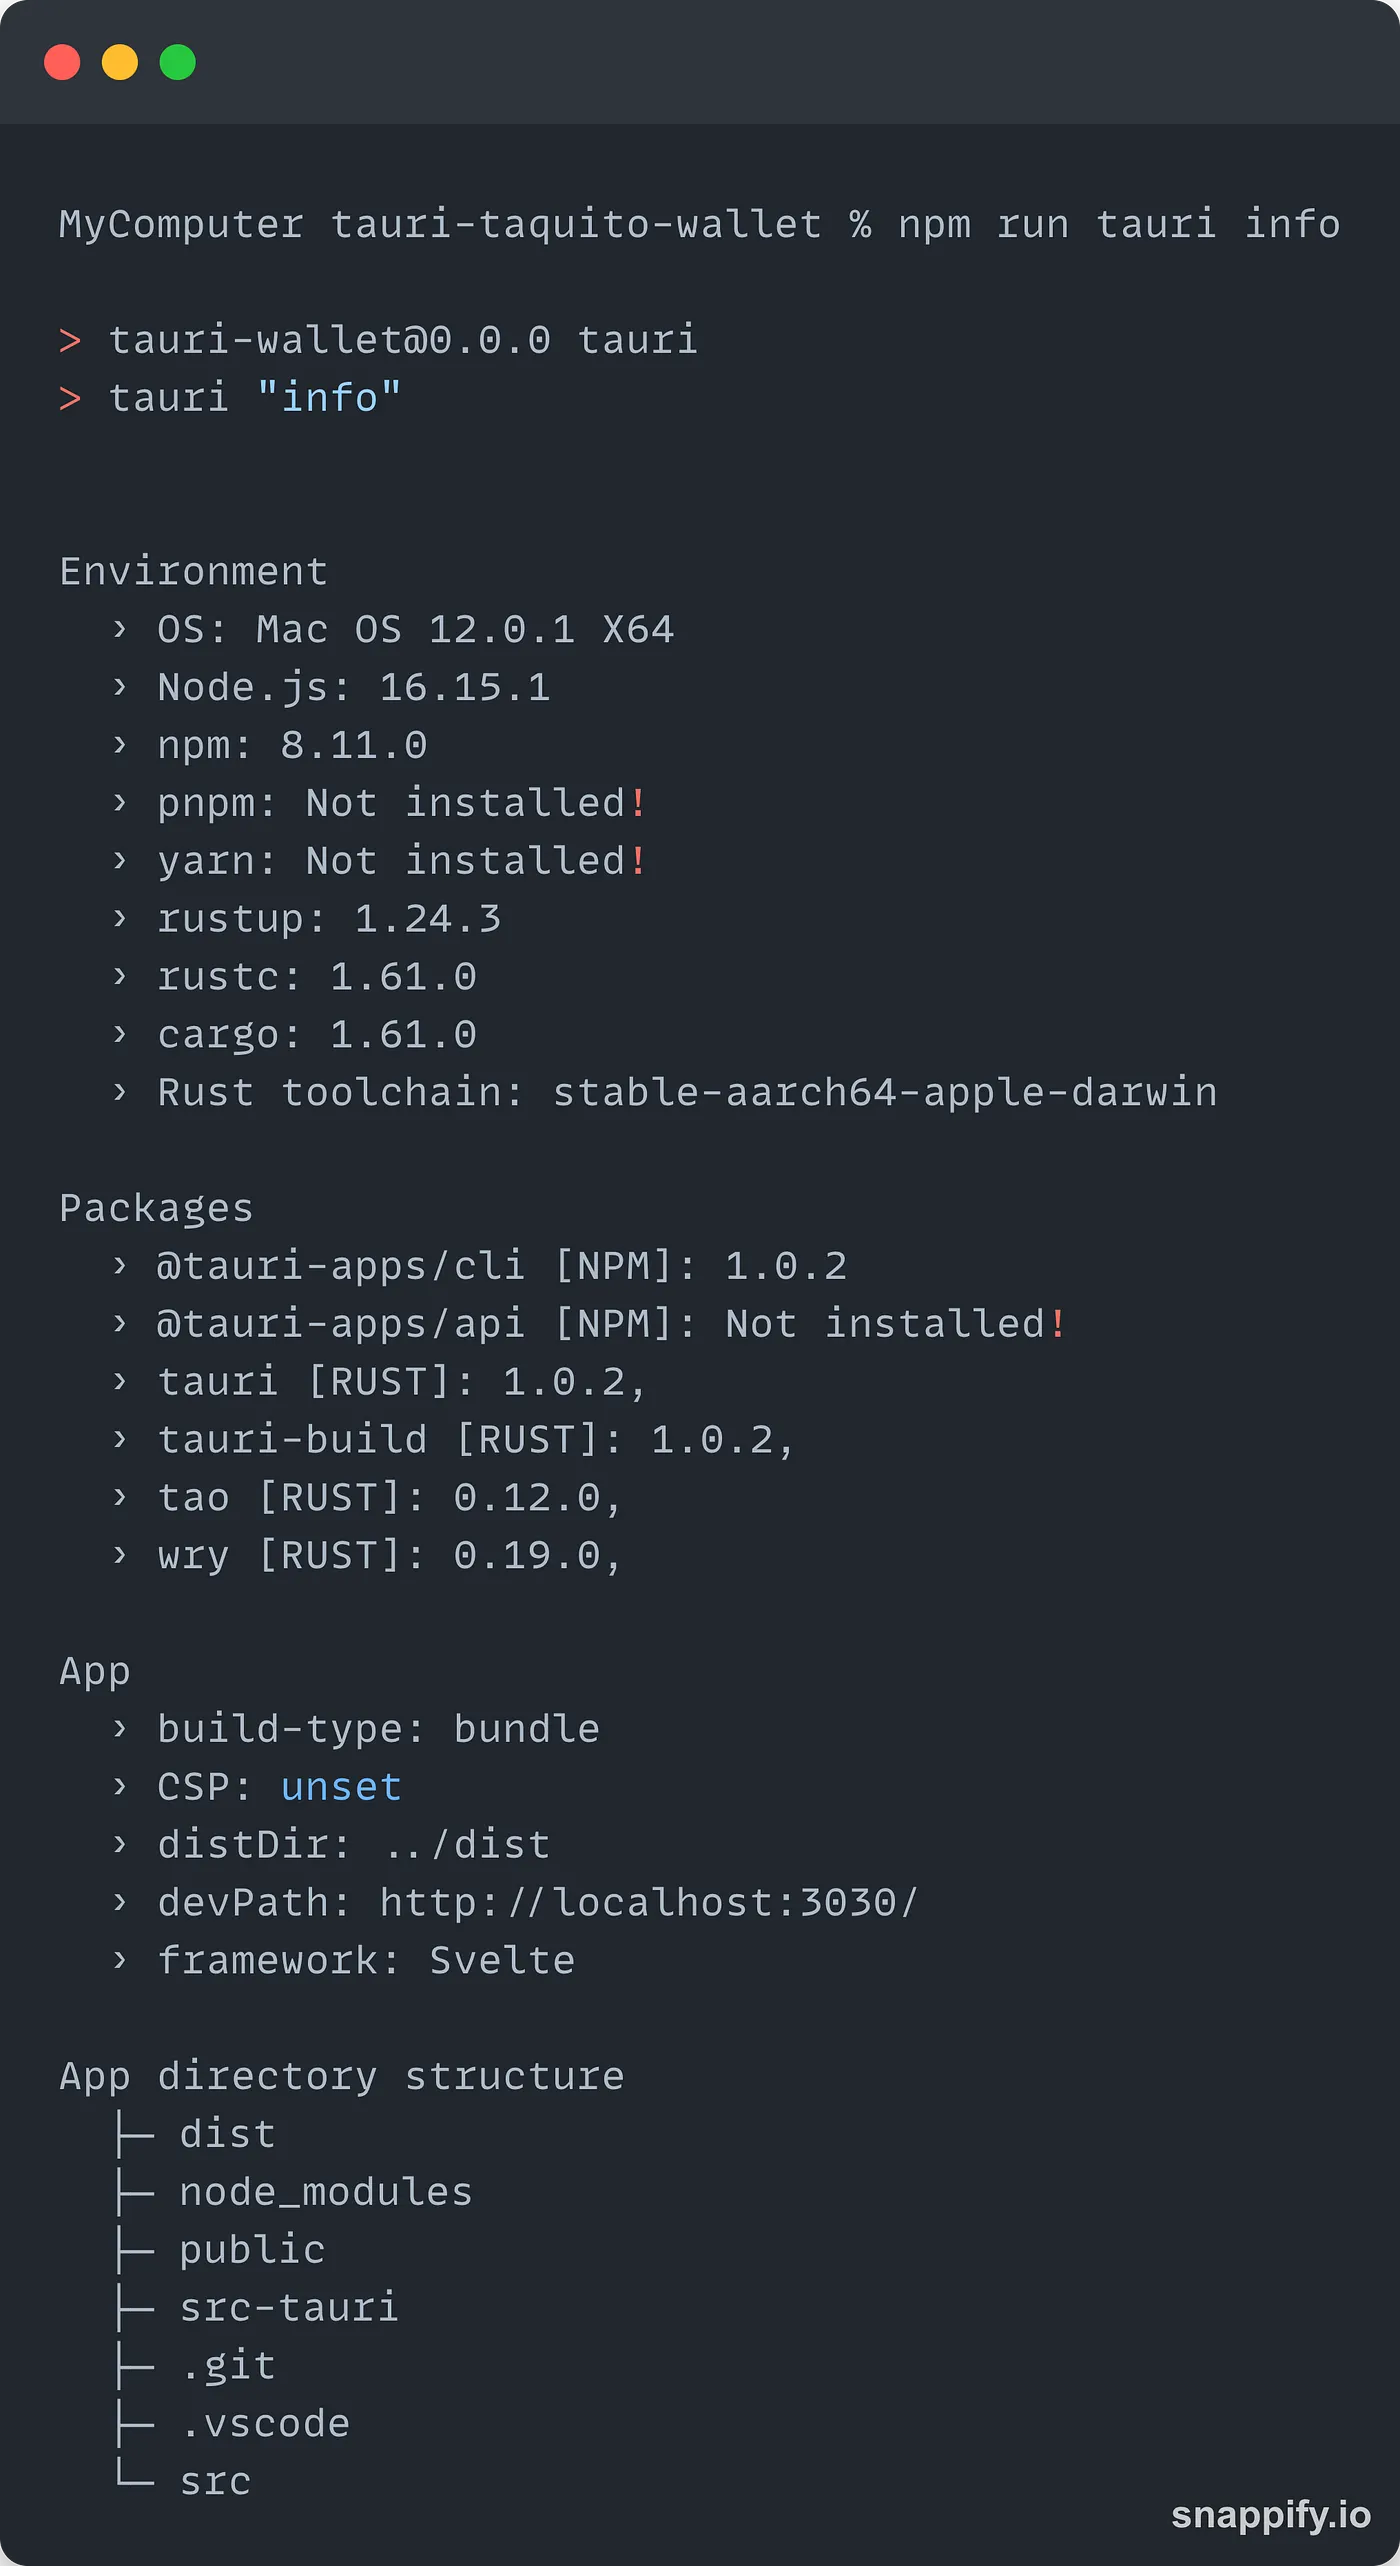
You should see something similar to this, with some differences if you are on another OS (I am on a Mac with an M1 chip).
Everything is ready now! If you type npm run tauri dev in your terminal, you should see your desktop app opening in a new window 🤩
General design of the app
The desktop app we are building here is a Tezos wallet. It will have three main functionalities:
- An account view: this will be used to input the private key to connect the wallet, disconnect the wallet and send tez
- A history view: we will use the TzKT API to get the last transactions sent/received by the account
- An NFT view: we will also use the TzKT API to display the NFTs held by the account
⚠️ Once again, I cannot stress it enough, do not use a personal account for this project. We are using Alice’s address in this example, a well-known account on Tezos only used for testing purposes.
The app will have a navigation bar at the top to switch between views. We are not going to add an icon for the app or bother with the menu as we want to focus on the app itself and Taquito. You can read the Tauri guides if you want to customize the look of the app.
The App.svelte file will be the main entry to the app and we will have different components for the different views.
The App and Header components
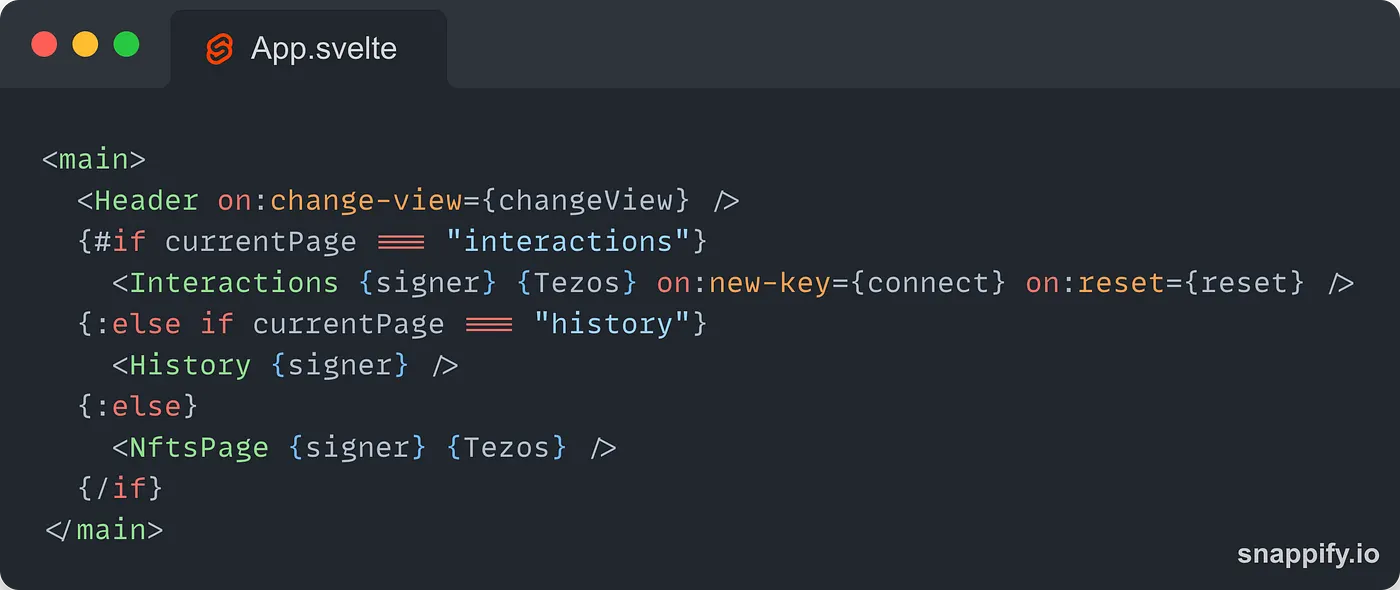
The main entry of the app, the App.svelte file, will be in charge of displaying the header and handling the routing. As this is not a web app, we will handle the routing manually by switching between different views:
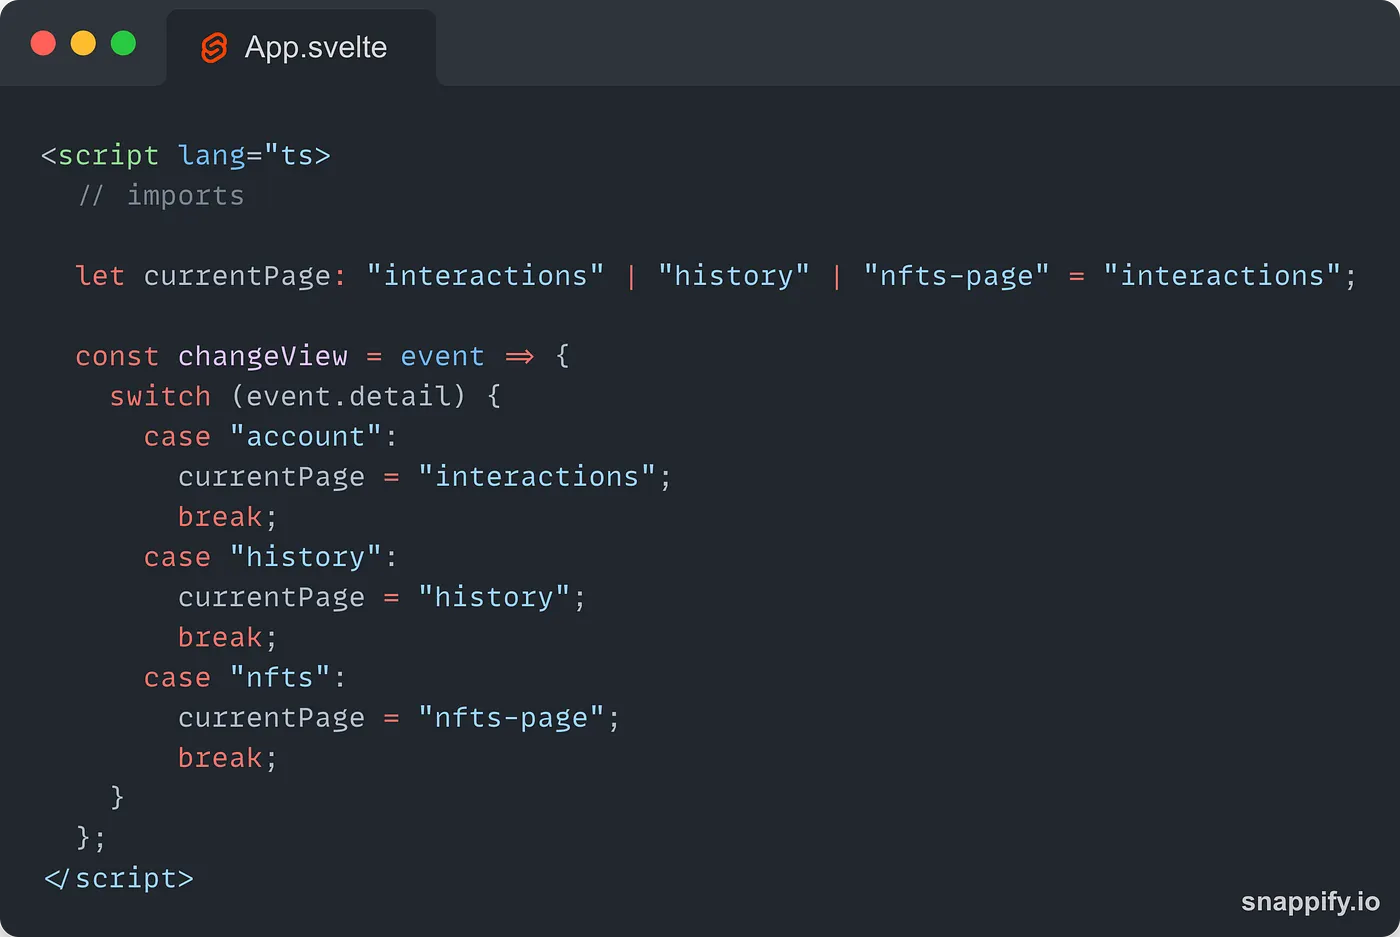
First, let’s create an enum to represent the different views. Then, we create the changeView function to switch between the different views. The event to change the view will be dispatched from the Header component and the view requested by the user will be stored in the detail property as a result. The Header has a very simple logic and its main purpose is to dispatch a new event when the user wants to switch the view:
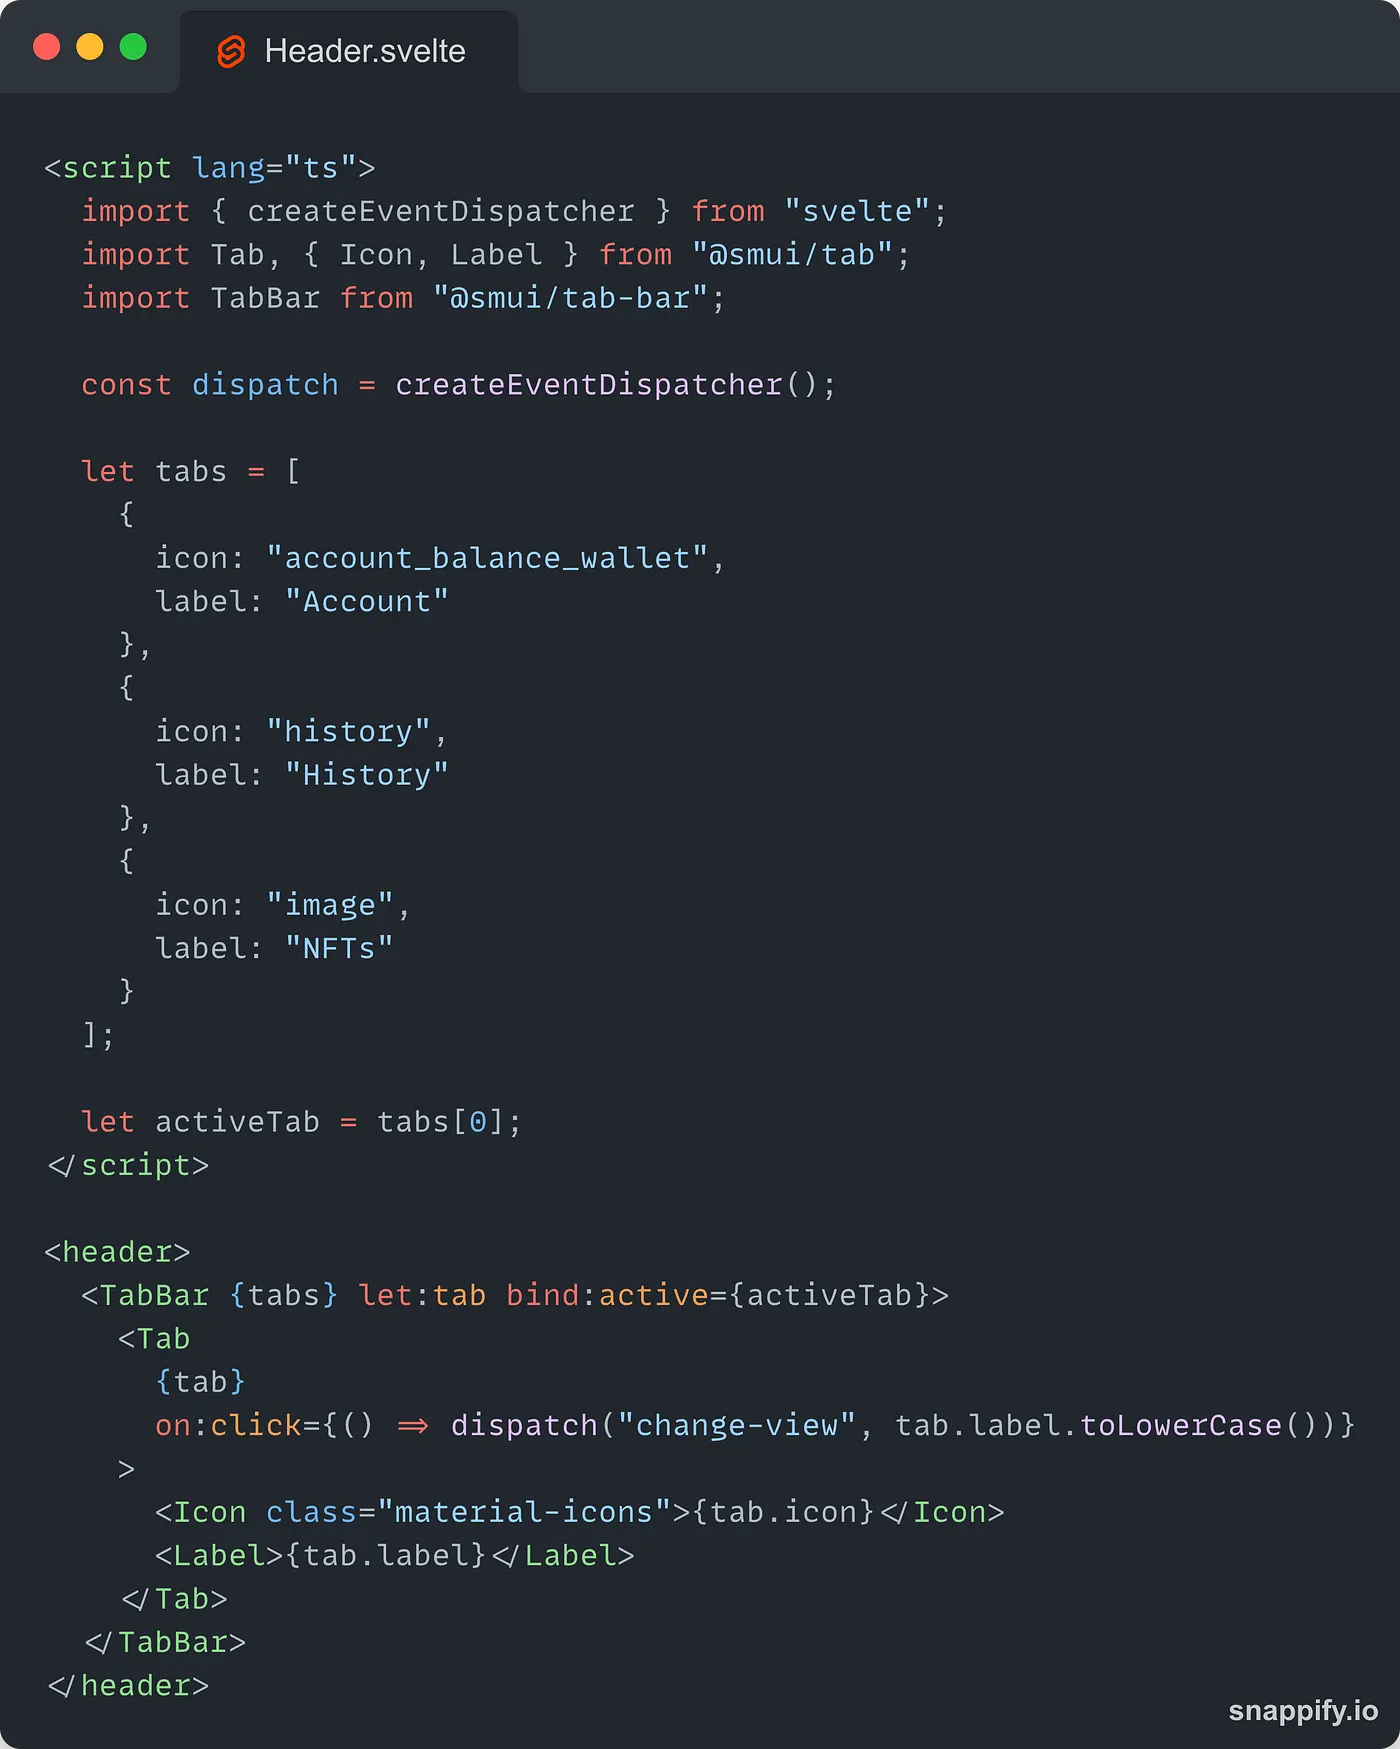
Now, we can add the Header to the App and write the logic to switch between views:
When the users are in the interactions view, they can connect their accounts. This will dispatch an event that the App component will listen to and will connect to the provided account when the event is fired:
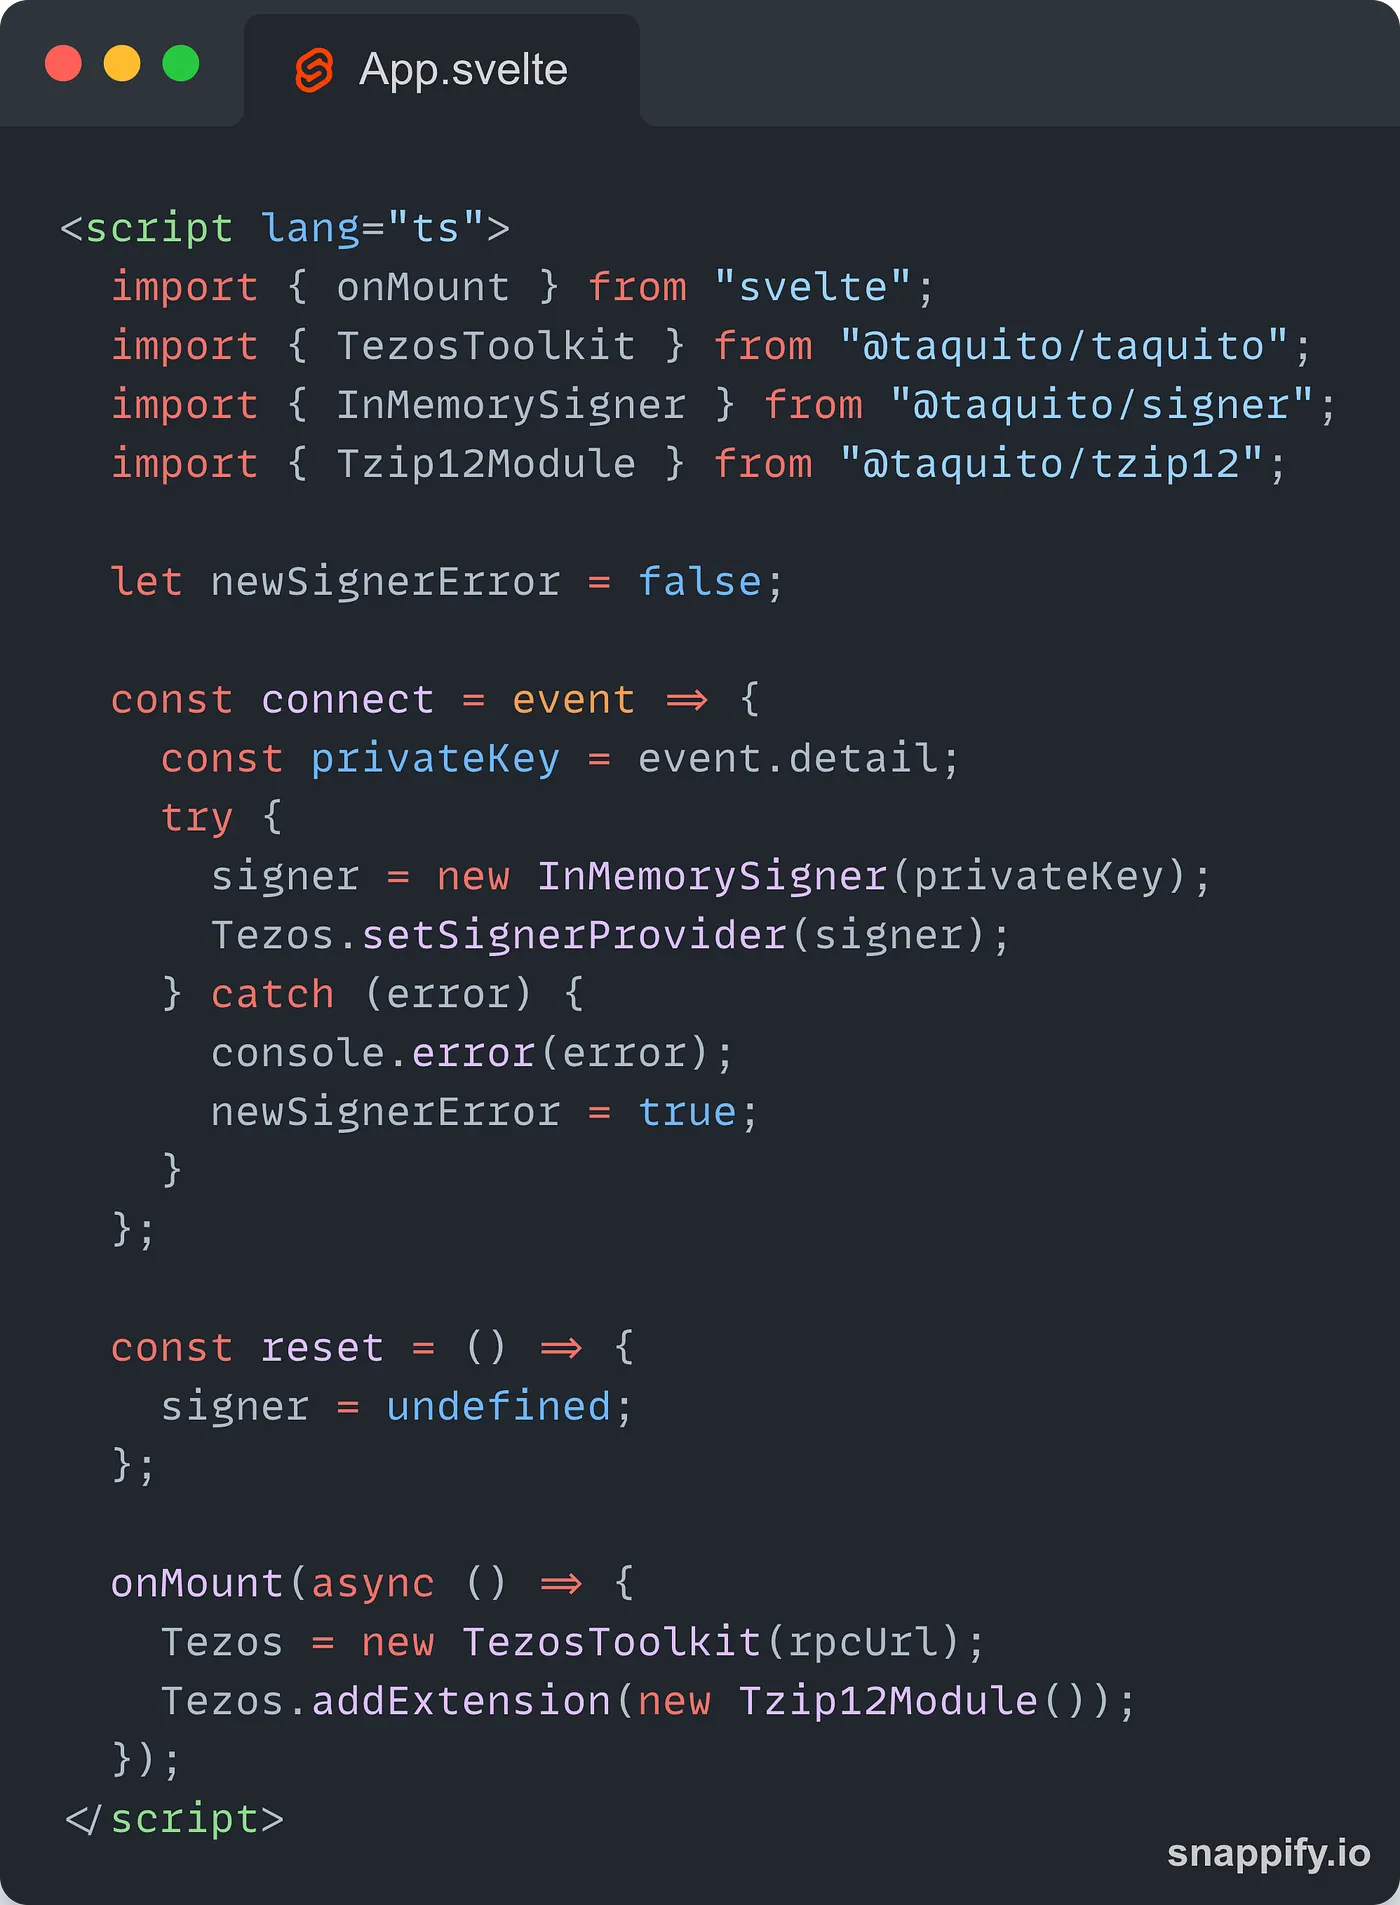
When the app mounts, we create the instance of the TezosToolkit that will interact with the blockchain. We pass it the Tzip12Module at the same time so we can read NFT metadata later. This instance will be passed to the various components of the app.
When a user wants to connect their wallet, we will use the InMemorySigner to create a new signer and we pass it to the instance of the TezosToolkit so we can use it later. We will also display an error message in case the creation of the signer fails.
The account view
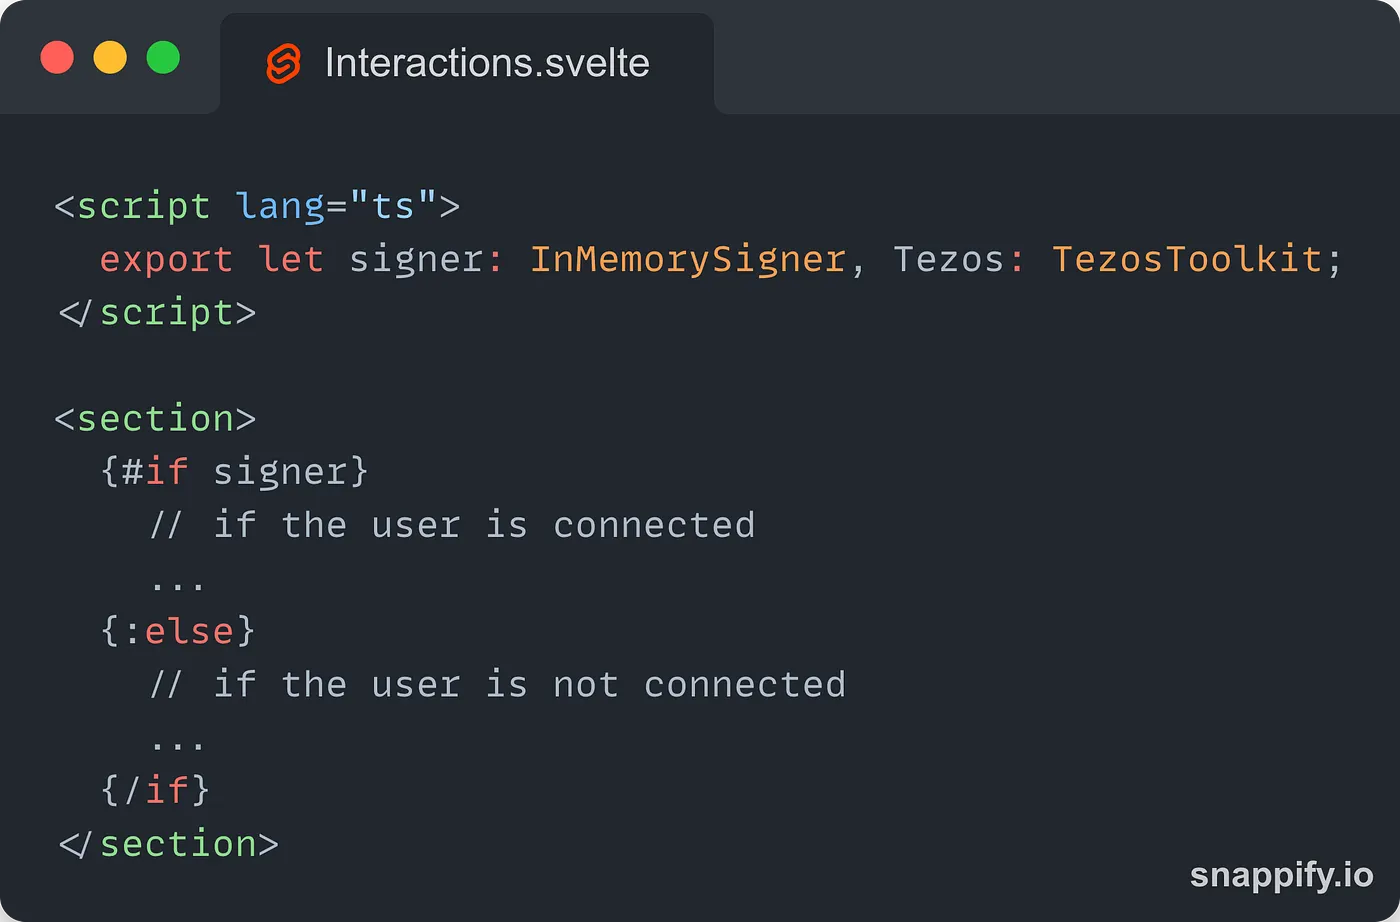
This is going to be the biggest of our components as it will handle the connection to the provided account, the disconnection of the wallet and the process of sending tez.
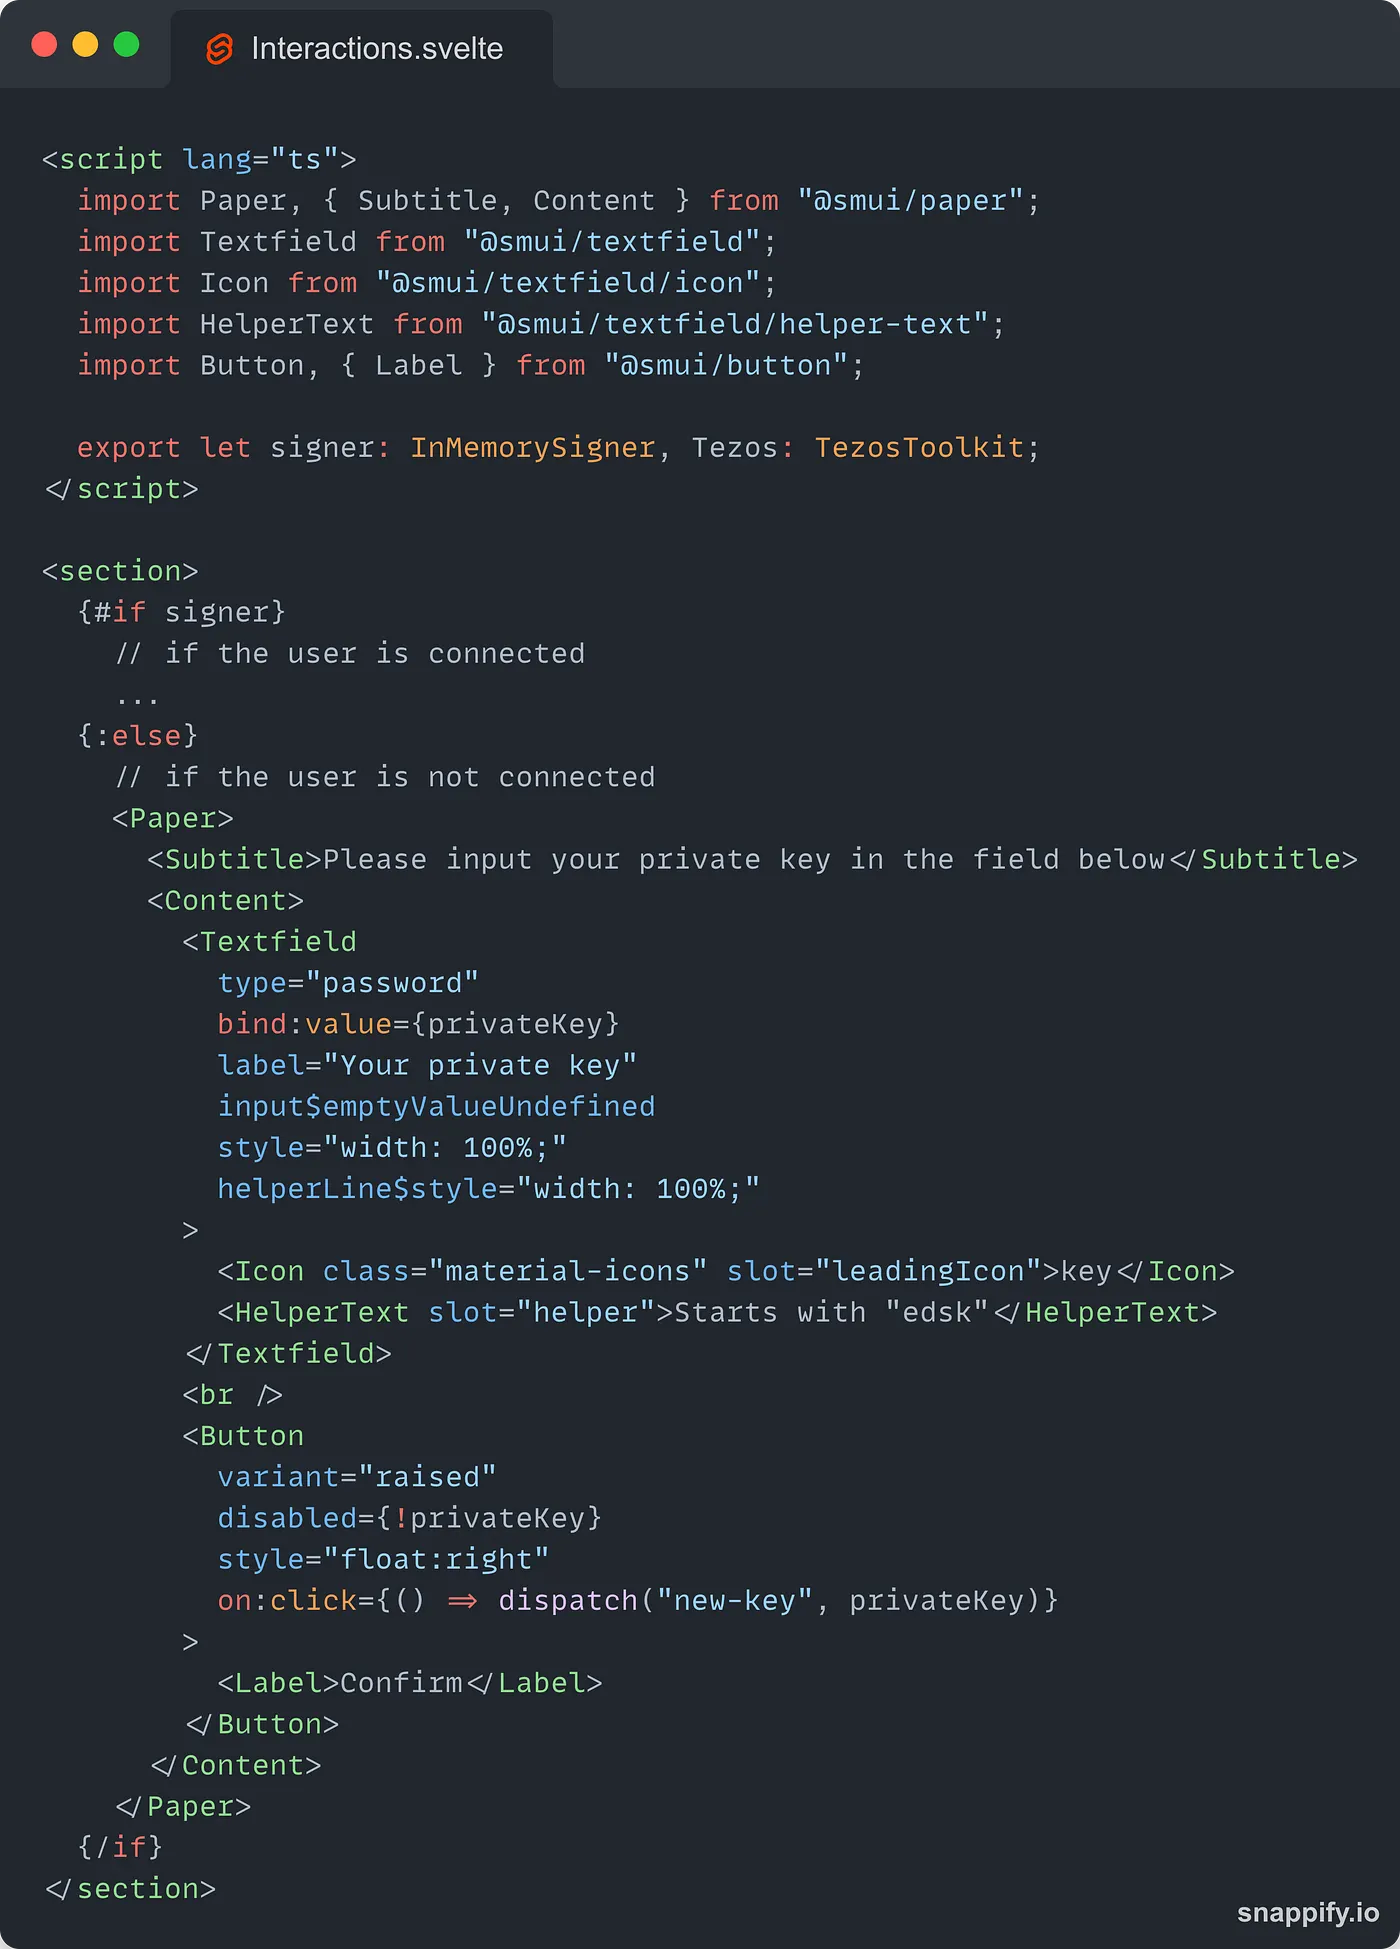
As the component receives the signer as a prop, we will be able to tell if the user is connected or not and update the view accordingly:
The HTML code here is not very interesting for this tutorial, we are using the Svelte Material UI library to get ready-to-use components. Here is what the view when the user is not connected looks like:
Once the user is connected, we can display the interactions view.
Let’s have a look at the function we will use to send tez from the wallet to another account:
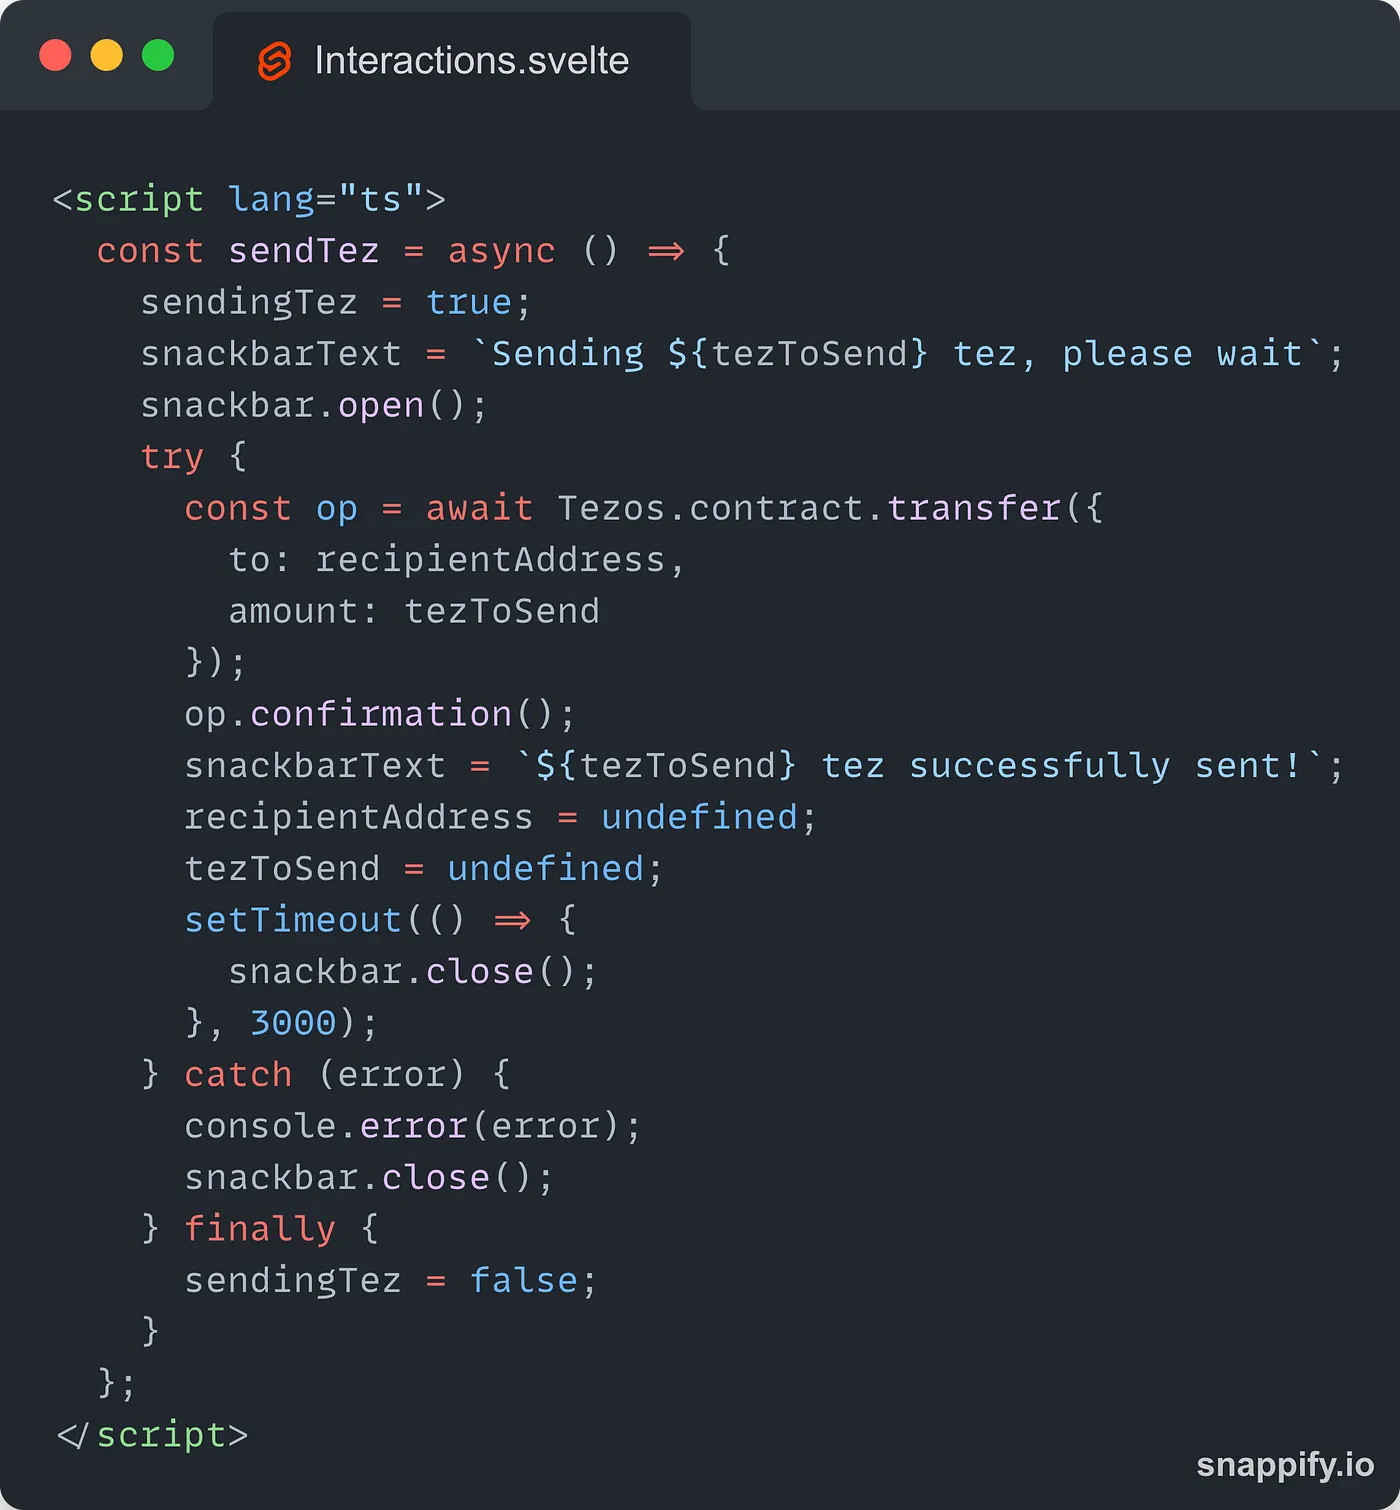
First, we’ll update the UI by freezing the different buttons and text fields when the sendingTez variable is set to true. We also display a snackbar to let the user know the transfer is ongoing.
Using the instance of the TezosToolkit passed as a prop, we call the transfer method available on the contract accessor and pass an object with an amount property to represent the amount of tez the user is sending and a to property for the address of the recipient.
This method will return an operation and we wait for one confirmation before updating the UI once again with the result and resetting it to its blank state.
We are also going to implement a button to let the user disconnect the wallet:
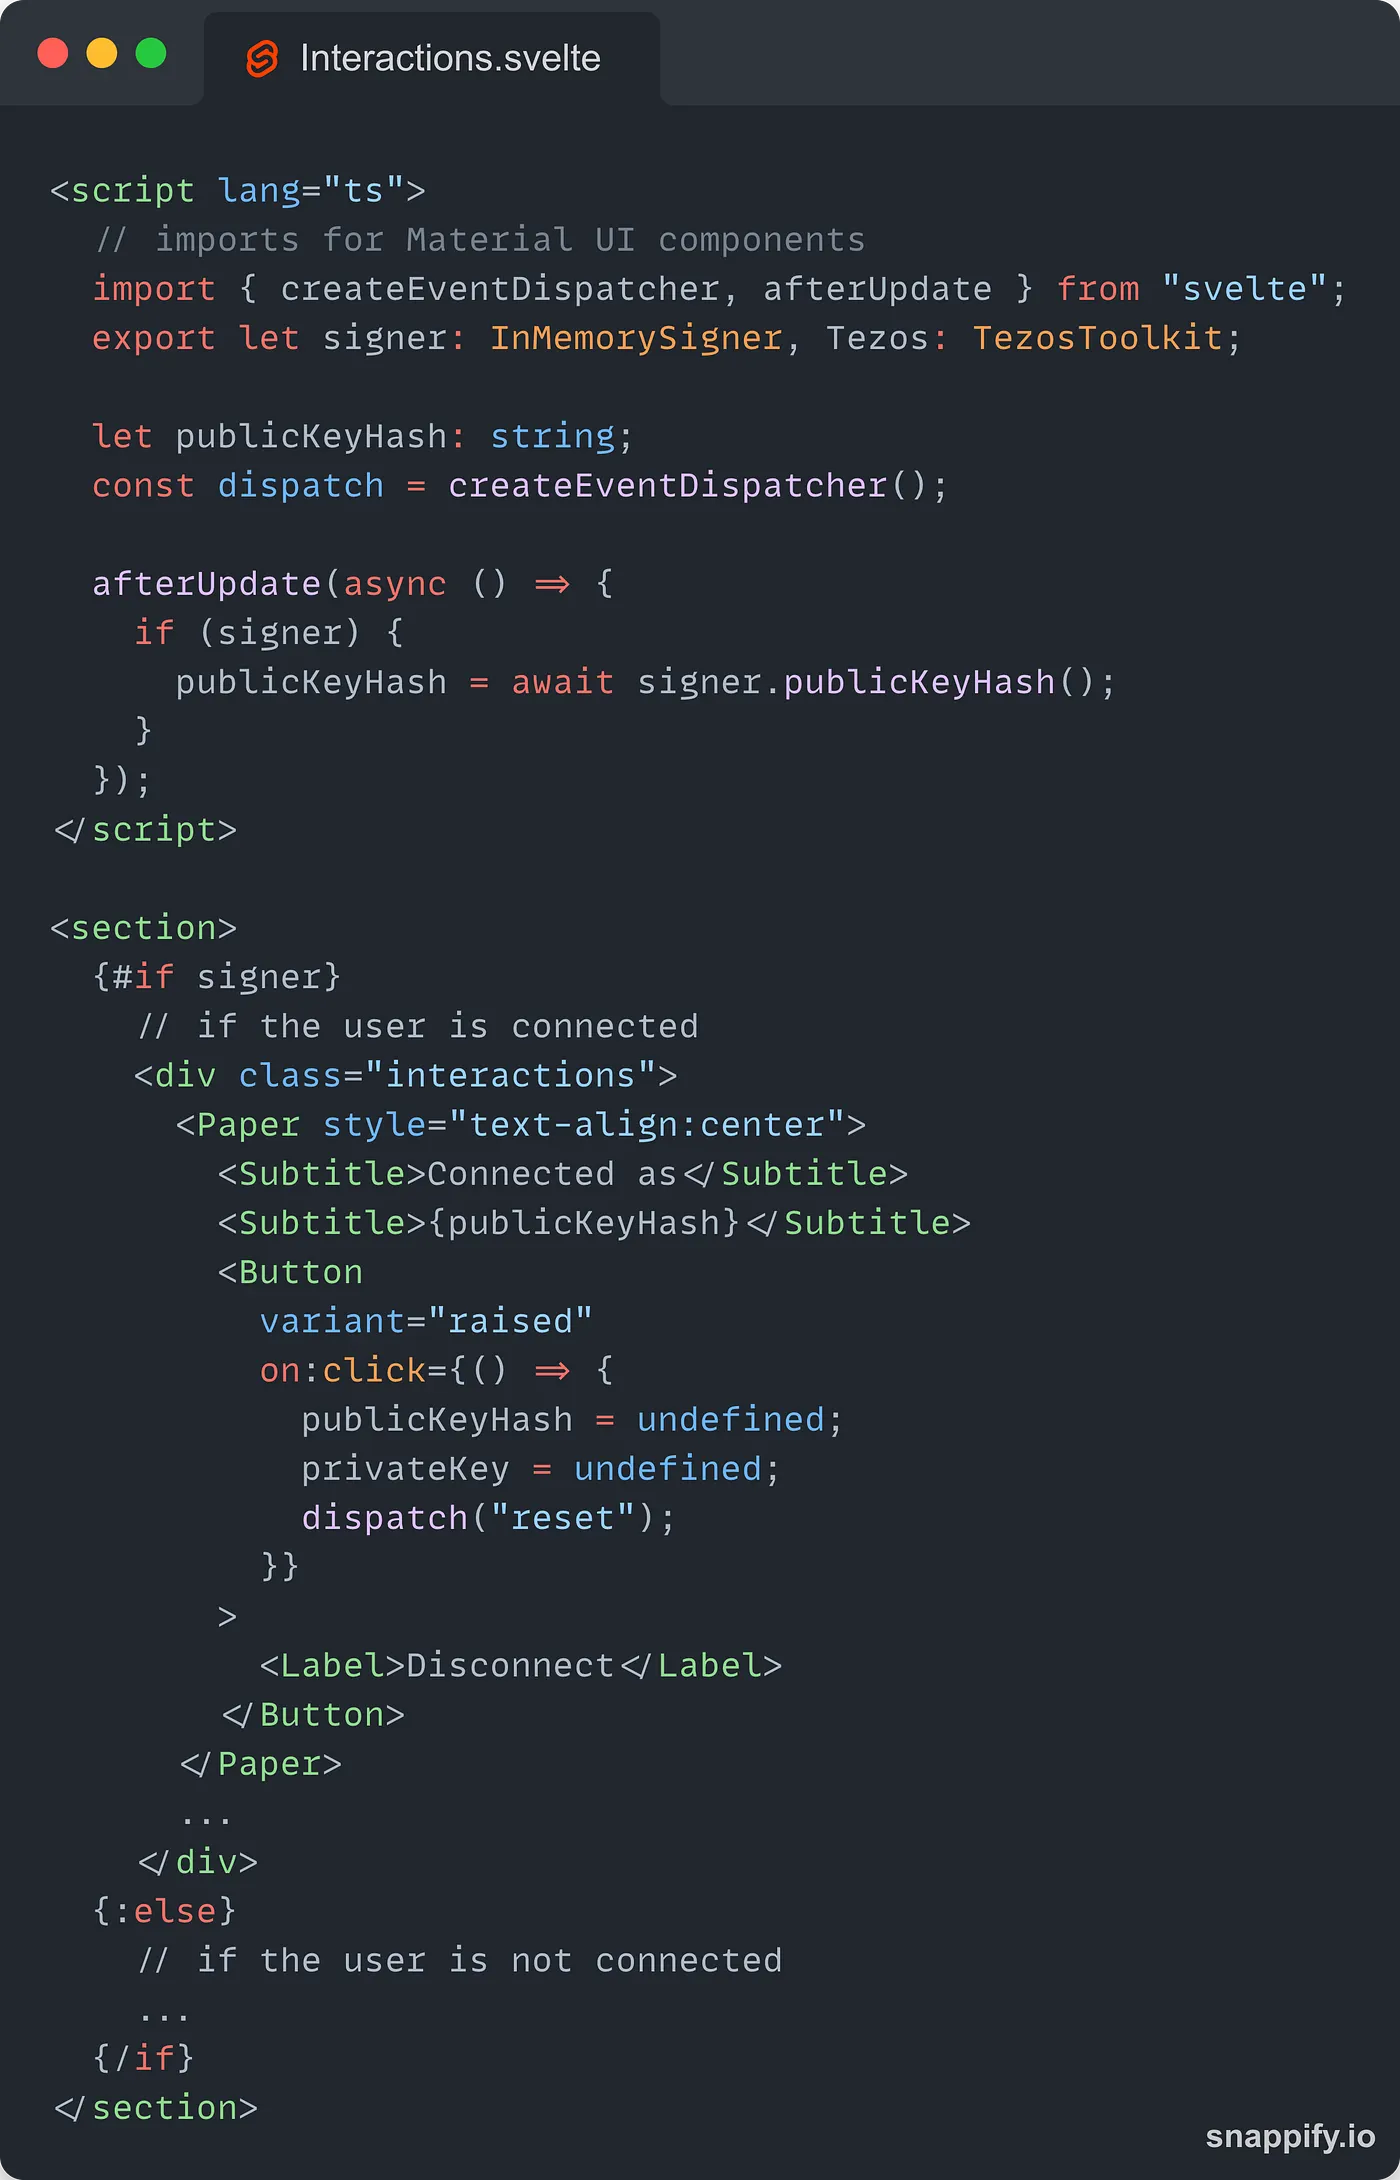
On click, the button will reset the different variables used in the component to undefined and will dispatch a reset event to the App component in order to reset the signer.
The history view
One of the most popular features of a crypto wallet is its transaction history. Because Taquito doesn’t have access to that kind of data, we have to use an indexer. My favorite one on Tezos is TzKT and we are going to use it to get the last ten transactions made from or to the provided account.
In the History component, we want to load those transactions when the component mounts:
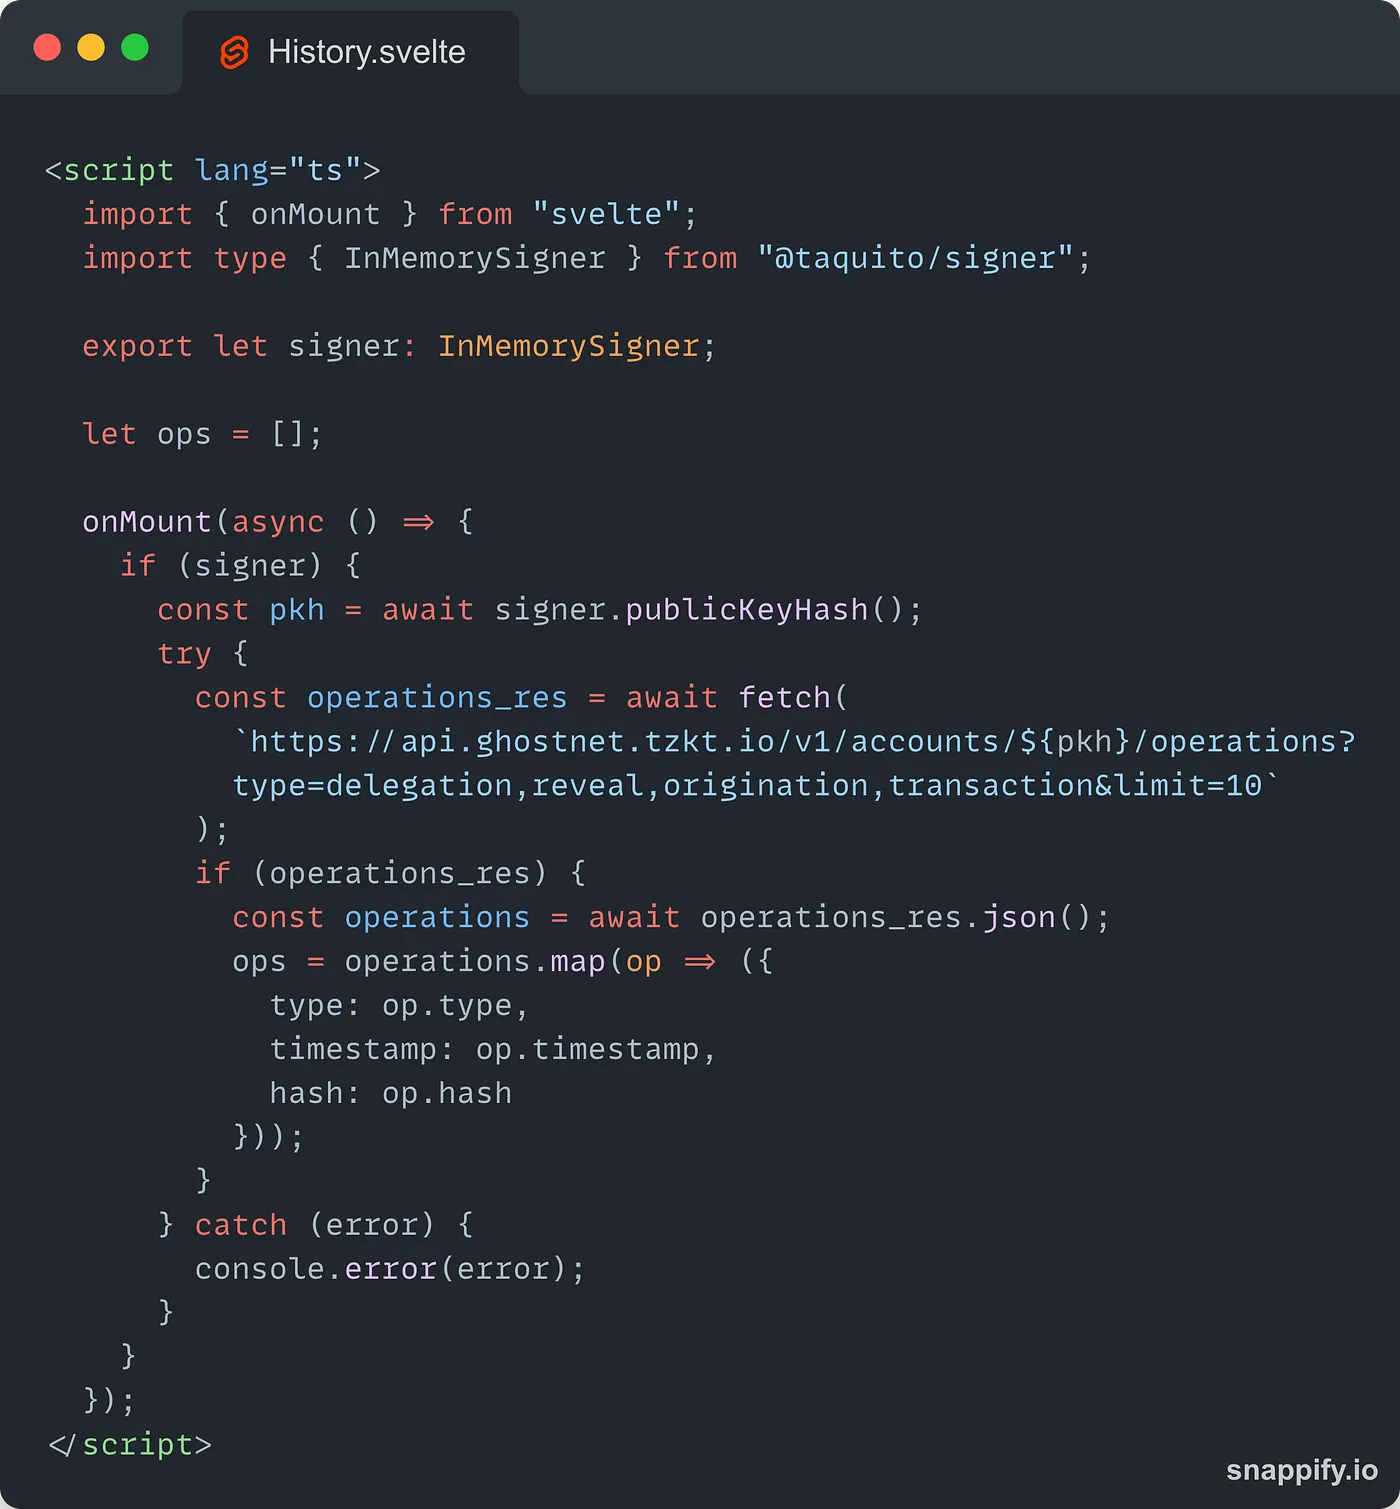
If a signer exists, it means that the user is connected. We can then get the public key hash of the account by calling signer.publicKeyHash() on the signer instance that returns a promise. We then use the pkh to build a request to the TzKT REST API. We want to get back the operations of type delegation, reveal and transactions.
The API will return an array of objects representing each operation. We map the array to extract the operation type, the timestamp and the hash.
Note: the data returned by the API is not processed as we don’t want to do anything too complicated for this tutorial. You are free to get more properties and process them the way you like if you want to improve the wallet!
The data is then saved into the ops array that we will use in the HTML code to display the different operations:
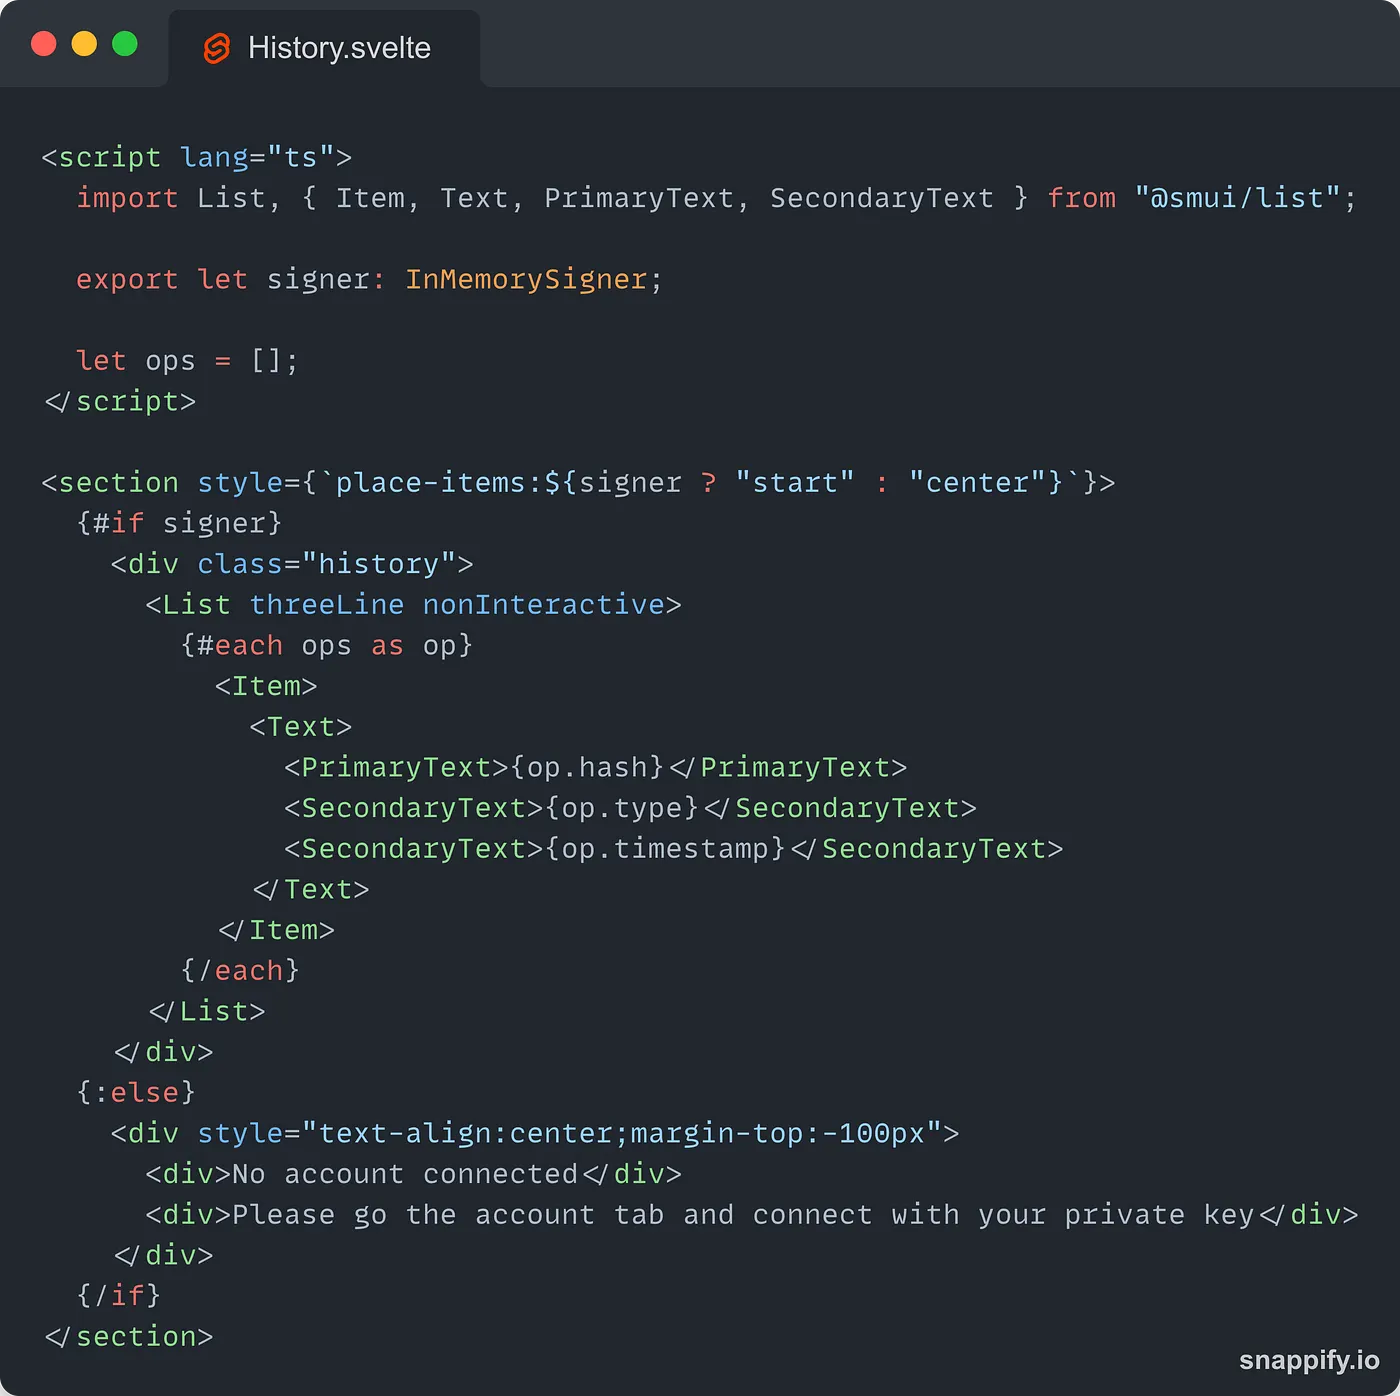
We use an each block to loop through the different operations and display them in the UI. We also handle the case of a non-connected user coming to the history page.
The NFT view
All the wallets on Tezos allow their users to visualize the NFTs they hold. This is a very important feature as Tezos is becoming the number one chain for NFTs. We will also implement a very simple NFT visualizer in our wallet 👨🎨
Once again, we will use the amazing API provided by TzKT to get the NFTs that belong to our user. The NFTs have to be fetched on mount and some visual feedback must be provided as fetching them may take a few seconds:
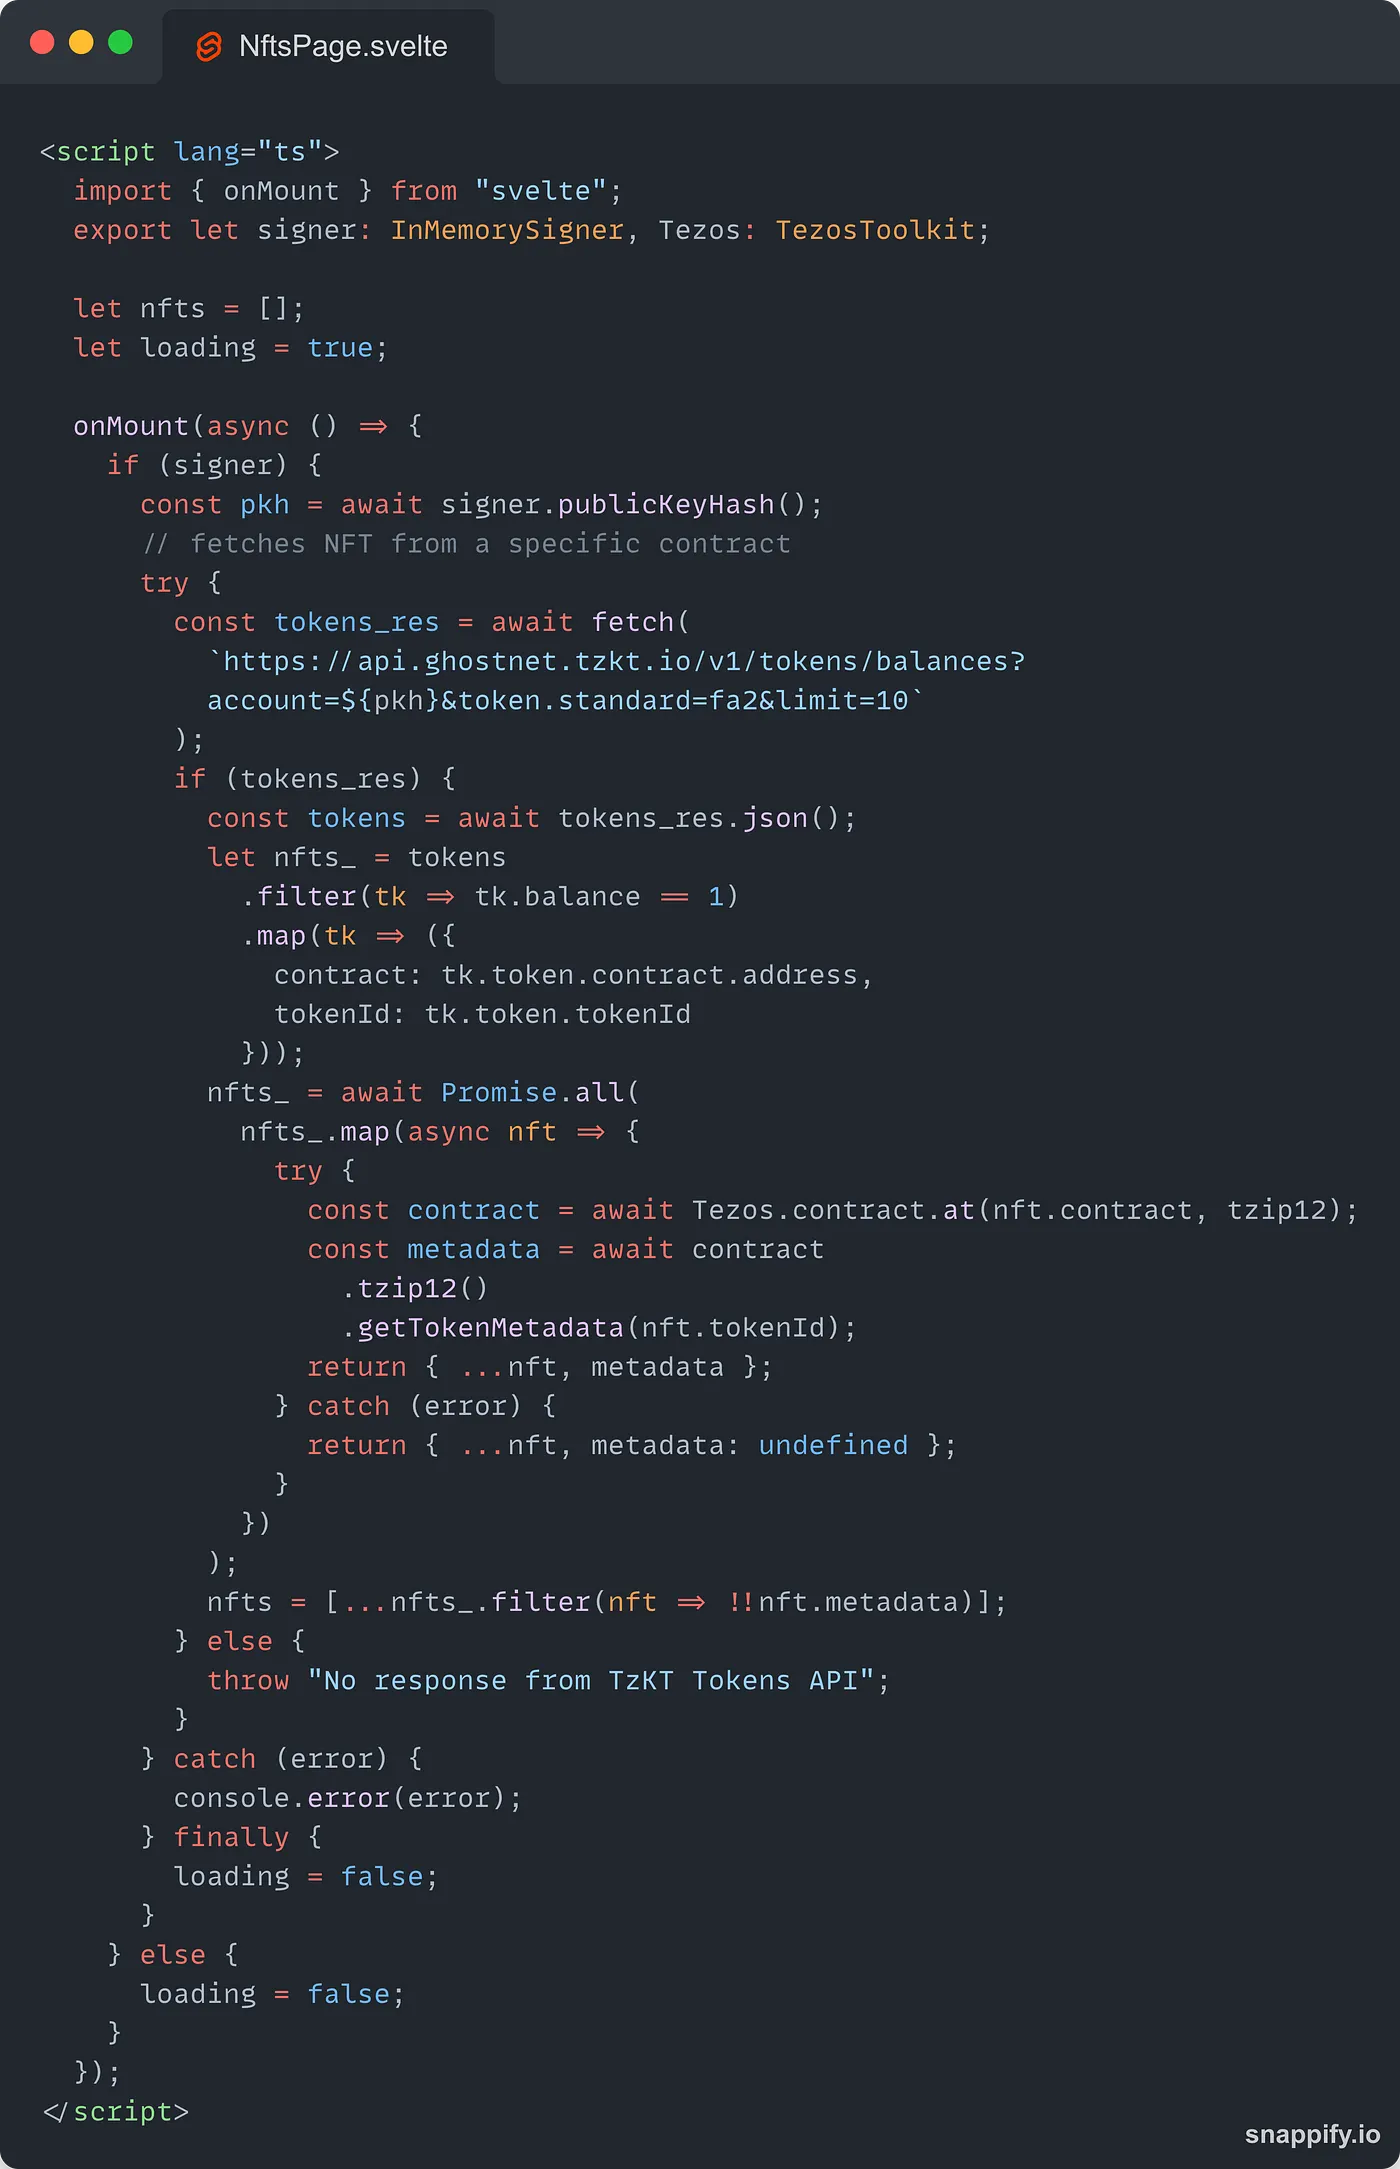
Note: you will see that code commented out in the repo. There were no valid NFTs on Ghostnet for Alice, so I had to reuse another contract that did not appear in the results of the Token API.
First, we should only look for NFTs if the user is connected. Then, we send a request to the API that will return a list of FA2 tokens associated with the provided account (FA1.2 doesn’t support NFTs). To keep this tutorial simple, we assume that a token with a balance of 1 is an NFT. We keep the address of the NFT contract and the token id.
Next, we create a contract abstraction with Taquito so we can use the tzip12 module we loaded at the beginning and retrieve the metadata of the token.
Note how easy Taquito makes it to get the metadata. If you wanted to do that manually, you would have to fetch the value in the
token_metadatabigmap, figure out where the metadata are stored and fetch them from there.
After that, we update the nfts array with the tokens while filtering the tokens to remove those that don’t have metadata (most probably because they were invalid).
Now, we can display the NFTs in the wallet:
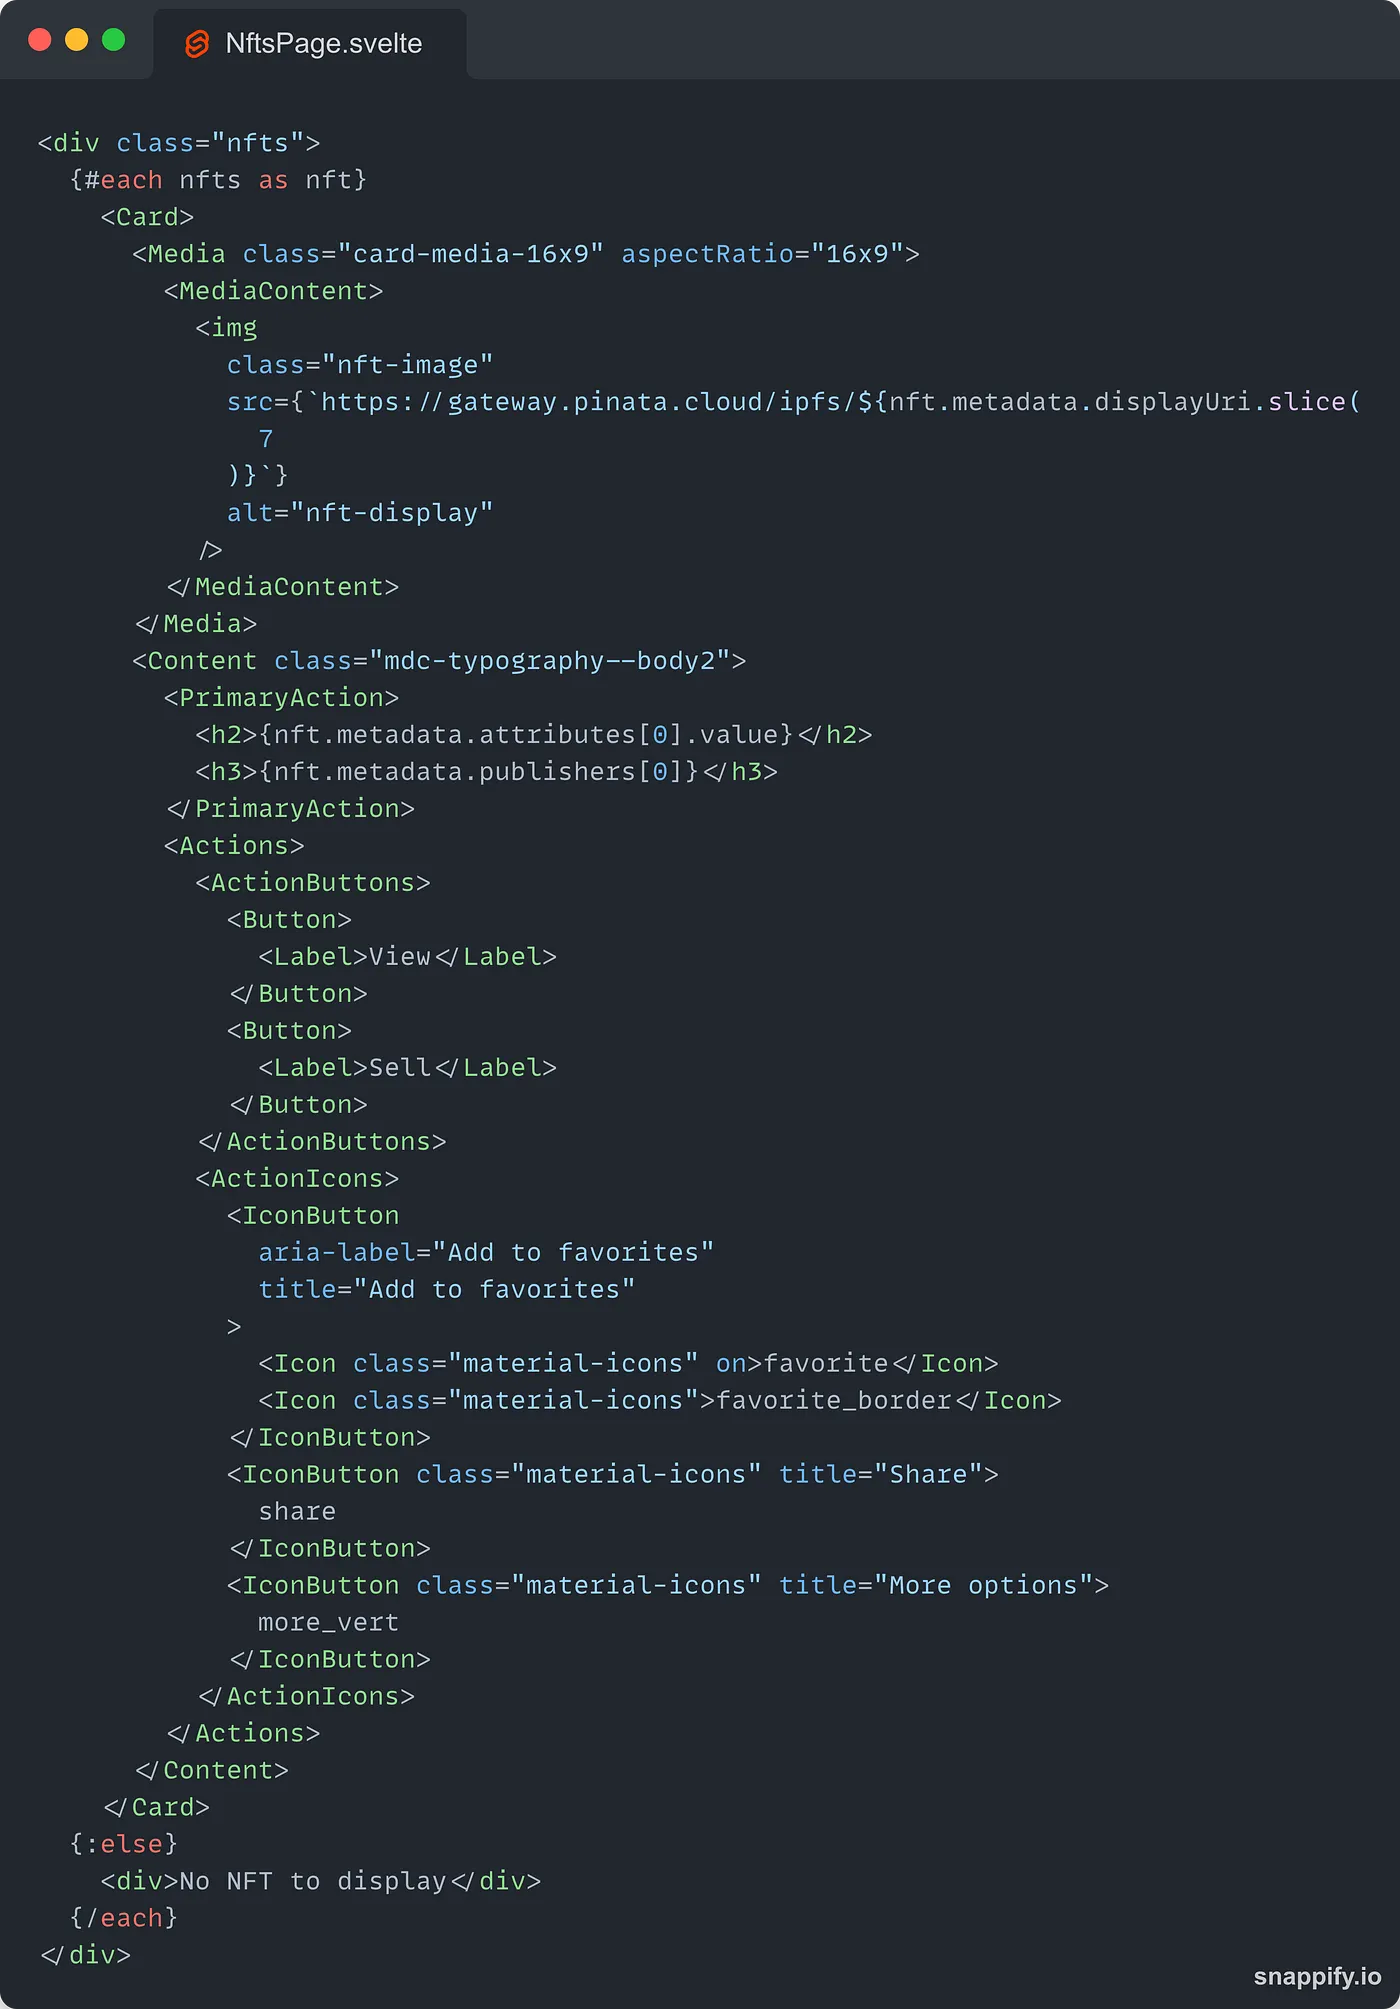
Once again, we are using an each block to display the NFTs. The component is built out of Material UI components. See how we parse the displayUri property before getting the NFT picture because it is stored as ipfs://IPFS_CID in the metadata. There are also a few dummy buttons at the bottom that you can use to extend the functionalities of the wallet if you want 🙂
Conclusion
A library as versatile as Taquito allows you to use it in many different environments where JavaScript is supported. The most obvious one is a front-end app, but it is also possible to build native desktop apps with Taquito using a framework like Tauri.
In addition to that, you can use the JavaScript front-end framework of your choice with Tauri (you are not limited to React) and even the bundler of your choice! Tauri will elegantly wrap your front-end app to produce a desktop app with a very small setup.
Desktop apps improve your user experience and branding, they are easier to access after installing them and Tauri produces a smaller app size compared to Electron, so why not use your favorite Tezos library and build a desktop app on your own. Put the link to your repo in the comments, I can’t wait to see what you are going to build 👷♂️
Useful links
- Taquito: https://tezostaquito.io/
- ViteJS: https://vitejs.dev/
- Svelte: https://svelte.dev/
- Tauri: https://tauri.app/
- TzKT API: https://api.tzkt.io/
- The steps to install Tauri with Svelte were taken from this article: https://medium.com/@cazanator/tauri-with-standard-svelte-or-sveltekit-ad7f103c37e7